
In This Article
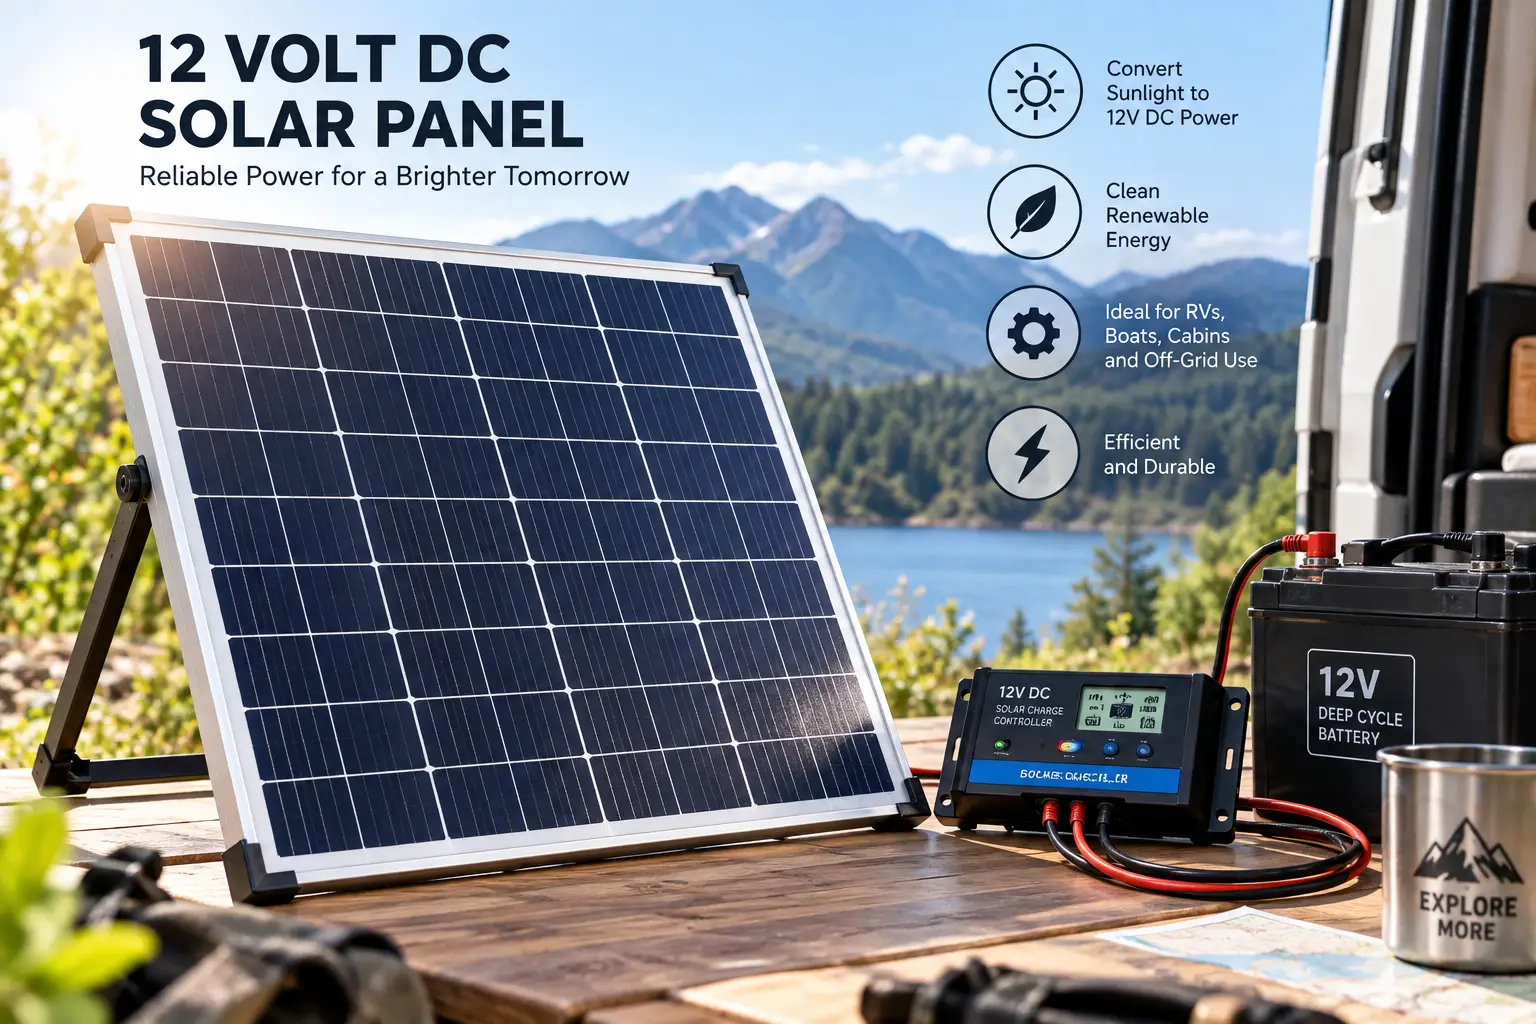
A 12 volt DC solar panel is a photovoltaic module engineered to charge a 12-volt battery bank directly (through a charge controller), producing raw direct-current electricity rather than the alternating current your home outlets use. It’s the backbone of most RV, van, marine, and small off-grid power systems in the US today. If you’ve started shopping for one, you’ve probably noticed something frustrating fast: nearly every listing on Amazon reads the same. “High efficiency.” “Easy installation.” “Off-grid applications.” None of that tells you which panel will actually keep your batteries topped off through a cloudy week in the Pacific Northwest, or which one will physically fit your Sprinter van’s roof rack.
That’s the gap this guide is built to close. Instead of repeating spec sheets, we pulled real aggregated review data, independent output testing, and manufacturer documentation on seven genuinely different 12 volt DC solar panel options — from budget polycrystalline units under $100 to premium American-made kits north of $400 — so you can match a panel to your actual use case instead of guessing. We’ll also walk through installation, common failure points, and how a 12 volt DC solar panel compares to a generator or shoreline hookup for keeping your batteries alive.
One quick note before we dive in: as an Amazon Associate, we earn from qualifying purchases made through links on this page, at no extra cost to you. That relationship never changes what we tell you about a product’s actual performance.
12 Volt DC Solar Panel Comparison at a Glance
If you’re in a hurry, here’s the short version. This table pulls the headline differences between the seven panels we cover below — wattage class, cell type, approximate price range, and who each one is actually built for.
| Panel | Cell Type | Price Range | Best For |
|---|---|---|---|
| Renogy 100W Monocrystalline (16BB N-Type) | Monocrystalline | around $90–$130 | All-around best value, compact roofs |
| Newpowa 100W Monocrystalline | Monocrystalline | around $80–$110 | Budget-conscious mono buyers |
| HQST 100W Polycrystalline | Polycrystalline | around $70–$100 | Absolute lowest entry price |
| WindyNation 100W Polycrystalline | Polycrystalline | around $80–$120 | Maximum raw wattage, ample roof space |
| ECO-WORTHY 2-Pack 100W (200W) Kit | Monocrystalline | around $150–$220 | Expandable multi-panel starter systems |
| Zamp Solar Obsidian 100W Kit | Monocrystalline | around $450–$550 | Premium, US-made, long-term reliability |
| Renogy 100W Flexible Monocrystalline | Monocrystalline | around $140–$180 | Curved roofs, vans, weight-sensitive installs |
Looking at the table, the pattern that jumps out is a straightforward efficiency-versus-cost trade-off: polycrystalline panels like the HQST 100W Polycrystalline and WindyNation 100W Polycrystalline undercut monocrystalline options on price but need more roof real estate to hit the same output. Buyers with a tight, curved, or weight-limited roof (van conversions, teardrop trailers) will generally get more usable watts per square foot from the Renogy 100W Monocrystalline or Renogy 100W Flexible Monocrystalline, while anyone building a whole-system, plug-and-play setup with the least fuss should weigh the ECO-WORTHY 2-Pack kit or the premium Zamp Solar Obsidian kit against how much hands-on wiring they’re willing to do themselves.
💬 One click helps other shoppers make an informed choice too! 😊
Top 7 12 Volt DC Solar Panels: Expert Picks and Analysis
Before breaking each panel down individually, here’s a fuller side-by-side look at how they compare on power delivery, weight, and warranty — the three factors that matter most once you’re past the sticker price.
| Panel | Rated Output | Approx. Weight | Warranty | Best For |
|---|---|---|---|---|
| Renogy 100W Monocrystalline (16BB N-Type) | 100W (25% cell efficiency) | ~14.3 lbs | 25-year output warranty | Compact rooftop installs |
| Newpowa 100W Monocrystalline | 100W | ~14.5 lbs | 2-year product / 25-year output | Budget mono buyers |
| HQST 100W Polycrystalline | 100W | ~14.3 lbs | 2-year product / 25-year output | Cheapest usable 100W panel |
| WindyNation 100W Polycrystalline | 100W (tested ~72.7W peak) | ~15.8 lbs | 1-year product / 25-year output | Max wattage, larger roofs |
| ECO-WORTHY 2-Pack 100W (200W total) | 200W combined | ~30 lbs combined | 1-year product / 5-year output | Multi-panel starter arrays |
| Zamp Solar Obsidian 100W Kit | 100W (~19% cell efficiency) | ~10 lbs | 5-year product / 25-year output | Premium, low-maintenance builds |
| Renogy 100W Flexible Monocrystalline | 100W | ~4 lbs | 5-year product / 25-year output | Curved or weight-sensitive roofs |
Reading across the rows, the WindyNation 100W Polycrystalline wins on sheer output in independent testing but carries the shortest product warranty and the most weight, which tells you it’s a panel built for people prioritizing cost-per-watt over long-term backing. The Zamp Solar Obsidian and Renogy monocrystalline options both back their panels with 25-year output warranties, which matters more than most buyers realize once you’re three or four years into RV ownership and a panel starts underperforming. If you’re assembling a 200W+ array from day one rather than starting with a single panel, the ECO-WORTHY 2-Pack shortens that path considerably, though its shorter output warranty is the trade-off for the lower per-watt price.
1. Renogy 100W 12V Monocrystalline Solar Panel — best all-around value for compact roofs
The 16BB N-Type cell architecture is the headline feature here, and it’s worth unpacking rather than skimming past. Renogy’s N-Type cells reach roughly 25% conversion efficiency, which in practical terms means this panel squeezes more usable wattage out of a smaller physical footprint than older P-PERC or polycrystalline designs — a real advantage if your RV or van roof is already crowded with vents and AC units. The IP67-rated connectors and IP65 junction box handle rain exposure without issue, and the corrosion-resistant aluminum frame with low-iron tempered glass is rated to deliver an average of 400–500 watt-hours per day under typical sun conditions. This model is the right call for anyone who wants a single, well-rounded panel without researching five brands first — it’s not the cheapest and not the most powerful, but it balances size, output, and durability better than almost anything else in this price band. In independent side-by-side output testing by Footprint Hero, the Renogy monocrystalline panel placed second among five 100-watt panels tested, outputting 71.6 watts under real sun (not the theoretical 100W rating, which is standard for all panels at STC — standard test conditions rarely match real-world sun angle and temperature). Reviews consistently report that the pre-drilled mounting holes and included Z-brackets make DIY installation genuinely approachable for first-timers, and complaints are rare beyond occasional shipping damage to the glass, which Amazon and Renogy both replace under warranty.
Pros:
- ✅ 25% efficient N-Type cells in a compact footprint
- ✅ 25-year limited output warranty backs long-term use
- ✅ IP67/IP65-rated hardware handles rain and dust well
Cons:
- ❌ Costs more upfront than basic polycrystalline options
- ❌ Rigid glass front isn’t ideal for curved or flexible mounts
At around $90–$130 depending on current promotions, the Renogy 100W monocrystalline panel sits in the middle of this list’s price spread, and given its independent test performance and warranty length, it’s a genuinely strong value rather than just a popular default.
2. Newpowa 100W 12V Monocrystalline Solar Panel — best budget monocrystalline pick
Newpowa’s 9-busbar cell design is the distinguishing feature worth explaining: busbars are the thin metal strips that collect current from the solar cell, and more of them (compared to older 5BB designs) reduces internal resistance and shading loss, translating to more consistent output on partly cloudy days. The panel uses high-performance cells encapsulated in EVA between tempered glass and a TPT backsheet, a build process nearly identical to pricier competitors, which is a big part of why this panel punches above its price point. Based on comparing the specs against the Renogy and HQST panels on this list, what Newpowa gives up is brand recognition and retail availability outside Amazon — not build quality. This is the panel to choose if your budget caps around $100 but you still want monocrystalline efficiency rather than dropping to polycrystalline. Footprint Hero’s independent testing placed the Newpowa panel second in raw output among the panels tested and noted it was the most compact and second-lightest of the group — genuinely useful if roof space is tight. Reviews consistently describe the panel as “well-made” for the price, with the most common complaint being that a charge controller isn’t included, so budget for that separately if you don’t already own one.
Pros:
- ✅ Monocrystalline efficiency at a near-polycrystalline price
- ✅ Compact and lightweight compared to same-wattage rivals
- ✅ 9-busbar cells reduce shading-related power loss
Cons:
- ❌ No charge controller included in the base panel purchase
- ❌ Smaller brand footprint means fewer third-party accessories
Priced around $80–$110, the Newpowa 100W panel is the pick for buyers who’ve done their research and don’t need the marketing budget baked into a bigger brand’s sticker price.
3. HQST 100W 12V Polycrystalline Solar Panel — lowest entry price for a usable 100W panel
The distinguishing feature of this panel is what it doesn’t have — extra cost padding for brand marketing — while still delivering the core specs that matter: an IP65-rated junction box, bypass diodes to reduce power loss during partial shading, and a frame rated to withstand snow loads up to 5,400 Pa and wind loads up to 2,400 Pa. What most buyers overlook with HQST’s panel is that “cheapest” doesn’t mean “worst engineered” here; it’s genuinely built to the same weatherproofing standards as pricier polycrystalline panels, just without the efficiency edge that monocrystalline cells provide. This panel is for the buyer whose top priority is dollars-per-watt and who has the roof space to spare, since polycrystalline cells are inherently a bit less space-efficient than monocrystalline ones. In Footprint Hero’s independent five-panel output test, the HQST panel placed last, which the reviewer characterized as “average” performance rather than poor — it simply didn’t lead the pack, though it remained fully usable for trickle-charging and moderate battery maintenance. Reviews consistently praise its light weight (about 14.3 lbs) and surprisingly compact size for a polycrystalline design, while a recurring complaint centers on inconsistent output reporting between the panel’s rear label and online spec sheets, so cross-check before assuming exact numbers.
Pros:
- ✅ The lowest realistic price point for a 100W panel
- ✅ Snow and wind load ratings match pricier competitors
- ✅ Lightweight and compact for a polycrystalline design
Cons:
- ❌ Placed last in independent output testing among peers
- ❌ Spec label and online documentation sometimes disagree
At roughly $70–$100, the HQST panel is best treated as a budget workhorse rather than a performance leader — a completely reasonable trade-off if you’re supplementing an existing array or working with a tight solar budget.
4. WindyNation 100W 12V Polycrystalline Solar Panel — best raw power output on a budget
This panel’s claim to fame is straightforward: it produced the highest wattage of any 100W panel in Footprint Hero’s independent side-by-side test, hitting a peak of 72.7 watts under identical test conditions where competing panels topped out lower. That’s a meaningful real-world difference if your priority is squeezing every available watt out of a fixed number of panel slots. The trade-off, and it’s a real one, is size and weight — at roughly 15.8 lbs, this is the heaviest and physically largest panel on this list, which matters if you’re mounting on a lightweight trailer roof or already fighting a weight budget on a van build. WindyNation is also notable for manufacturing in Canada rather than overseas, which some buyers specifically look for, and reviews note the panel tends to be a better value when purchased directly through WindyNation’s own site rather than third-party marketplaces. This is the panel for buyers with generous, flat roof space — think larger travel trailers, cabins, or ground-mount off-grid setups — who want maximum output per panel rather than the most compact footprint. Reviews consistently describe the build quality as solid and “everything else about it standard,” meaning it doesn’t cut corners to hit its price, it just doesn’t add premium extras either.
Pros:
- ✅ Highest output among 100W panels in independent testing
- ✅ Solid, no-frills build quality at a competitive price
- ✅ North American manufacturing appeals to some buyers
Cons:
- ❌ Largest and heaviest panel on this list by a clear margin
- ❌ Shortest product warranty period of the group (1 year)
Priced around $80–$120, the WindyNation panel earns its spot for anyone whose limiting factor is panel count rather than roof space or weight.
5. ECO-WORTHY 2-Pack 100W (200W) Monocrystalline Solar Panel Kit — best expandable starter kit
The distinguishing feature here is the packaging itself: instead of buying one panel and researching a second purchase later, this kit delivers 200 watts of monocrystalline capacity from day one, compatible with both 12V and 24V battery banks depending on how you wire the pair. Each panel uses monocrystalline cells suitable for on-grid, off-grid, and hybrid systems, which gives buyers flexibility if their power needs (or living situation) change later. Here’s what the spec sheet doesn’t say, but real owner feedback reveals: this kit ships without mounting hardware, so factor a hardware-store trip or a separate bracket purchase into your total cost and installation timeline. The included cable length, around 35 inches per panel, is also on the shorter side, and larger RV installs commonly need extension cables to reach the charge controller. This kit is the right call for anyone starting a shed, garden, or small off-grid build from scratch who wants both panels ready to wire together rather than sourcing them separately, and it’s also a reasonable way to future-proof an RV system if you suspect you’ll eventually want more than a single 100W panel’s worth of charging capacity. Reviews consistently describe the setup process as straightforward for anyone comfortable with basic 12V wiring, with the most common friction point being that missing hardware.
Pros:
- ✅ 200 watts of monocrystalline capacity in one purchase
- ✅ Compatible with both 12V and 24V battery configurations
- ✅ Straightforward wiring for buyers who’ve done basic 12V work
Cons:
- ❌ No mounting hardware included in the box
- ❌ 35-inch cables often require extensions for RV installs
At around $150–$220 for the pair, the ECO-WORTHY kit works out to a competitive per-watt price once you account for the second panel, making it a strong pick for anyone building a 200W array on a budget.
6. Zamp Solar Obsidian Series 100W Solar Panel Kit — premium, American-made reliability
Zamp’s Obsidian Series distinguishes itself on two fronts: it’s roughly 30% lighter and less than half the thickness of a standard rigid panel at just 0.67 inches, while still using a rigid aluminum frame rather than a bendable laminate — a genuine engineering middle ground between fragile flexible panels and bulky traditional glass modules. Handcrafted at Zamp’s Bend, Oregon facility, this panel backs its build with a 25-year limited output warranty and a 5-year product warranty, both longer than most competitors on this list. What most buyers overlook when sticker-shocked by Zamp’s pricing is what that price is actually buying: American manufacturing, more rigorous quality control, and — based on comparing owner forum discussions across brands — a meaningfully lower failure rate over 5+ years of RV use than budget alternatives. This is squarely the panel for buyers who treat their RV or van as a long-term home rather than an occasional-use vehicle, and who’d rather pay more once than replace a cheaper panel twice. Reviews on RV owner forums are genuinely polarized: many long-time users report their Zamp panels outlasting multiple budget panels their neighbors replaced, while a smaller but vocal group reports frustrating customer service experiences after a failure — worth weighing since Zamp’s premium positioning implies support should match the price.
Pros:
- ✅ 25-year output warranty, among the longest available
- ✅ 30% lighter and thinner than standard rigid panels
- ✅ American-made with tighter quality control reputation
Cons:
- ❌ Significantly pricier than every other panel on this list
- ❌ Customer service experiences are inconsistent per owner reports
At around $450–$550 for the 100W kit, Zamp Solar asks a real premium — but for buyers who’ve been burned by a cheaper panel failing early, that premium buys documented peace of mind, not just a logo.
7. Renogy 100W 12V Flexible Monocrystalline Solar Panel — best for curved roofs and weight-sensitive builds
The defining feature is right in the name: this panel bends up to 240 degrees, letting it conform to curved Airstream roofs, pop-up campers, or irregular van surfaces where a rigid panel simply won’t sit flush. At roughly 4 lbs, it’s dramatically lighter than every rigid panel on this list, which matters directly for fuel economy and payload capacity on weight-limited builds. Here’s what the spec sheet doesn’t say, but industry-wide review patterns reveal: flexible panels as a category run measurably hotter than rigid panels because they lack an air gap between the cells and the mounting surface, and that heat buildup accelerates degradation over time — a trade-off inherent to the flexible format, not unique to Renogy. Renogy also recommends adhesive mounting over screws for this model, which some installers see as a sign of a sturdier, more purpose-built design, while others find it a less permanent, less serviceable installation method than bolted rigid panels. This panel is the right choice specifically for curved-roof vehicles or anyone who has calculated that every pound matters for their build’s total weight budget — it is not the pick for buyers chasing maximum lifespan from a single panel. Reviews consistently note easy installation and genuine flexibility up to the rated curve, with the most common longer-term complaint being reduced output after two to three years of heat exposure compared to rigid panels of the same wattage.
Pros:
- ✅ True 240° flexibility fits curved and irregular roof shapes
- ✅ Roughly a quarter the weight of comparable rigid panels
- ✅ Adhesive mounting eliminates roof penetrations entirely
Cons:
- ❌ Runs hotter, which can shorten usable lifespan versus rigid
- ❌ Generally less durable long-term than glass-faced panels
Priced around $140–$180, the Renogy flexible panel commands a premium over its rigid sibling specifically for the curve and the weight savings — a fair trade if your install genuinely calls for it, and an unnecessary one if it doesn’t.
How to Install and Maintain a 12 Volt DC Solar Panel
Getting a 12 volt DC solar panel running safely comes down to four connections done in the right order, and most first-time mistakes happen from skipping or reordering a step rather than from a bad panel. First, mount the panel using the included Z-brackets or, for flexible panels, manufacturer-approved adhesive — always seal any screw penetrations with dicor lap sealant or a similar RV-rated sealant to prevent roof leaks, which is the single most common regret reported by first-time installers. Second, wire the panel to a charge controller (PWM or MPPT) rated for at least the panel’s peak output; connecting a panel directly to a battery without a controller risks overcharging and permanently damaging lithium or AGM batteries. Third, connect the charge controller to the battery bank before connecting the panel to the controller — this order matters because controllers typically need to detect battery voltage first to calibrate properly. Fourth, connect the panel last, then verify charging voltage with a multimeter before walking away. For maintenance, wipe the glass or laminate surface every few weeks with plain water and a soft cloth; dust and pollen buildup measurably cuts output, and abrasive cleaners can scratch anti-reflective coatings. Check all wiring connections and crimped terminals twice a year for corrosion, especially in marine or coastal environments where salt air accelerates connector degradation. Common first-30-day mistakes include mounting panels flush against a roof with no airflow gap (which raises operating temperature and reduces output), undersizing the wire gauge between panel and controller (which causes voltage drop over longer cable runs), and forgetting to check that panel polarity matches the controller’s input before powering on.
Best 12 Volt Solar Panel for RV Owners and Van Lifers: Real-World Scenarios
Matching a panel to your actual lifestyle matters more than chasing the highest wattage rating on the shelf, so here are three realistic profiles pulled from common RV and van-life use patterns.
The weekend boondocker — someone who takes their travel trailer out two or three weekends a month and mostly runs LED lighting, a water pump, and phone charging, with occasional generator backup for the microwave. A single HQST 100W Polycrystalline or Newpowa 100W Monocrystalline panel comfortably covers this load, since daily consumption rarely exceeds 30–40 amp-hours and a budget panel refills that easily on a clear day.
The full-time van lifer running a fridge and laptop daily — this profile needs sustained, reliable daily output, often 60–100 amp-hours a day between a 12V compressor fridge, laptop charging, and interior lighting. Here, the Renogy 100W Monocrystalline or, for curved van roofs, the Renogy 100W Flexible Monocrystalline, paired with at least one additional panel, is the more realistic baseline — a single 100W panel alone will likely leave this user power-short on shorter winter days.
The long-term Airstream or fifth-wheel owner who’s done the math on total cost of ownership — someone who’s already replaced a budget panel once and wants to stop thinking about their solar setup for the next decade. The Zamp Solar Obsidian 100W Kit‘s 25-year output warranty and lighter, thinner build make it the rational choice here, even at a premium price, since the cost of a second failed panel and reinstallation often exceeds the price difference within a few years.
Common 12V Solar Panel Problems and How to Fix Them
Even a well-chosen panel runs into predictable issues, and most have straightforward fixes once you know what to look for. Problem: output seems far lower than the rated wattage. This is almost always normal — panels rarely hit their STC (standard test conditions) rating in real-world use; expect 65–75% of rated output on a good day, and check for shading, dust buildup, or a suboptimal tilt angle before assuming the panel is defective. Problem: charge controller shows no output at all. Check polarity first (reversed connections won’t damage most modern controllers but will prevent charging), then test the panel’s open-circuit voltage with a multimeter in direct sun to confirm the panel itself is producing power before troubleshooting the controller. Problem: battery isn’t reaching full charge despite apparent good sun exposure. This usually points to an undersized wire gauge causing voltage drop over a long cable run, or a charge controller that isn’t sized correctly for the panel’s amperage — both are fixable without replacing the panel itself. Problem: visible hot spots or discoloration on the panel surface. This typically indicates a failed bypass diode or cell damage from a manufacturing defect or physical impact, and it’s a legitimate warranty claim on any panel still within its coverage window. Problem: flexible panel output declining after a year or two. As covered above, this is a known characteristic of flexible panel technology due to heat buildup against the mounting surface, and improving airflow behind the panel (where the mounting method allows) can slow, though not eliminate, this decline.
✨ Not sure which panel fits your exact power draw? Run the numbers with our comparison table above before you buy — it’ll save you a return shipment. 🔋
How to Choose a 12 Volt DC Solar Panel
Picking the right panel comes down to seven decision points, roughly in order of importance for most RV and off-grid buyers:
- Calculate your daily amp-hour need first. Add up the amp-hours every device you’ll run draws in a typical day; this single number should drive every other decision, not the other way around.
- Match total wattage to that number, not to what’s on sale. A rough rule of thumb is that one 100W panel produces roughly 30 amp-hours on a good sun day — buy enough panels to comfortably exceed your daily draw, with margin for cloudy stretches.
- Choose monocrystalline if roof space is limited, polycrystalline if it isn’t. Monocrystalline cells deliver more watts per square foot; polycrystalline panels are cheaper per watt if you have space to spare.
- Decide rigid versus flexible based on your roof shape, not weight alone. Flexible panels solve a real problem on curved roofs but trade away long-term durability — don’t choose flexible just because it’s lighter if your roof is already flat.
- Confirm charge controller compatibility before buying the panel. PWM controllers are cheaper but less efficient than MPPT controllers, especially as panel voltage rises above battery voltage; check what you already own or budget for the right type.
- Check the output warranty length, not just the price tag. A panel with a 25-year output warranty backed by a company with a track record of honoring claims is worth more than a marginally cheaper panel with a 1-year warranty.
- Read aggregated reviews for your exact use case, not just star ratings. A 4.5-star average tells you little; look for patterns in what verified buyers say about your specific application — marine, van, or stationary off-grid — since failure modes differ by environment.
According to the U.S. Department of Energy’s overview of how solar photovoltaic technology works, sunlight striking a PV cell creates electrical charges that flow in response to the cell’s internal electrical field — the same basic physics applies whether you’re powering a house or a single 12V battery bank, just at a dramatically smaller and simpler scale.
Common Mistakes to Avoid When Buying a 12 Volt DC Solar Panel
The most expensive mistake buyers make is undersizing their system from the start — buying a single 100W panel because it’s the cheapest listing on the page, then discovering within a month that it can’t keep pace with a compressor fridge and a laptop running daily. A close second is skipping the charge controller entirely or buying one that’s undersized for the panel’s amperage, which either fails to charge the battery efficiently or, worse, risks overcharging in direct sun. Buyers also frequently overlook wire gauge, running thin, cheap cable over a 15–20 foot run and losing a meaningful percentage of their generated power to voltage drop before it ever reaches the battery. Another common misstep is choosing a flexible panel purely for its lower weight on a flat roof where a rigid panel would have worked fine and lasted longer — flexible panels solve a specific curved-roof problem, not a general “lighter is better” one. Finally, many first-time buyers skip reading the actual output warranty terms, assuming all panels are backed equally, when coverage length and what triggers a valid claim vary significantly between brands like Zamp Solar and lesser-known Amazon-only sellers.
Monocrystalline vs Polycrystalline: Which 12V Solar Panel Cell Type Wins?
The short answer is that neither cell type universally “wins” — they solve different problems. Monocrystalline cells, like those in the Renogy 100W Monocrystalline and Newpowa 100W Monocrystalline, are cut from a single silicon crystal, which gives electrons a more uniform path to flow through and typically yields efficiency in the 20–25% range for the panels covered in this guide. That efficiency translates directly into more watts per square foot of roof space, which is why monocrystalline dominates RV and van installations where roof real estate is genuinely scarce. Polycrystalline cells, used in the HQST 100W Polycrystalline and WindyNation 100W Polycrystalline, are made from multiple silicon fragments melted together, which is cheaper to manufacture but yields slightly lower efficiency, typically in the 15–18% range for comparable panels. In practice, this means a polycrystalline panel needs a physically larger surface area to match a monocrystalline panel’s output — noticeable if you’re comparing the WindyNation’s larger footprint against the more compact Renogy panel in the table above. For a ground-mounted off-grid cabin system with unlimited space, that trade-off barely matters, and the lower per-watt cost of polycrystalline makes more financial sense. For a rooftop RV or van install where every square inch competes with vents, AC units, and antennas, monocrystalline’s higher output density usually justifies its modest price premium.
12V Solar Panel Kits vs Standalone Panels
A 12v solar panel kit — like the ECO-WORTHY 2-Pack or Zamp Solar Obsidian options on this list — bundles a panel (or panels) with a compatible charge controller, cabling, and sometimes mounting hardware into a single purchase, while a standalone panel like the Renogy 100W Monocrystalline or HQST 100W Polycrystalline requires you to source those components separately. The practical advantage of a kit is compatibility certainty: the controller is guaranteed to be correctly sized for the panel’s output, removing a common point of buyer error covered above. The trade-off is flexibility and, often, total cost — buying components individually frequently costs less if you’re willing to research controller sizing yourself, and it lets more experienced users choose a higher-quality MPPT controller than what ships in a budget kit. Kits make the most sense for first-time solar buyers who want a tested, compatible bundle and are willing to pay a small premium for that certainty, while standalone panels suit buyers who already own a controller from a previous setup or who want to hand-pick each component for a specific system design.
12 Volt DC Solar Panels vs Gas Generators and Shore Power
For RV and off-grid buyers, a 12 volt DC solar panel isn’t the only way to keep batteries charged, so it’s worth weighing against the two most common alternatives directly.
| Factor | 12V Solar Panel | Gas Generator | Shore Power Hookup |
|---|---|---|---|
| Ongoing cost | Free after purchase | Fuel + maintenance costs add up | Campground fee or utility bill |
| Noise | Silent | Loud, often restricted by campgrounds | Silent |
| Reliability | Weather-dependent | Reliable regardless of weather | Reliable when available |
| Best for | Boondocking, daily off-grid use | Backup power, high-draw appliances | Full hookup campgrounds |
Looking at the comparison, the clearest takeaway is that a 12 volt DC solar panel and a generator solve different problems rather than competing head-to-head — solar handles steady, silent, day-to-day charging for free once installed, while a generator remains the more reliable option for short bursts of high-draw power (air conditioning, power tools) or multi-day stretches of genuinely bad weather where solar output drops off. Many experienced boondockers run both, using solar as their default charging method and keeping a generator as backup rather than a primary power source, since fuel costs and noise restrictions in many campgrounds make generators impractical for daily use. Shore power, meanwhile, is really only relevant if your travel style includes regular stays at full-hookup campgrounds — for anyone who dry-camps or boondocks even occasionally, a solar setup pays for itself in avoided campground fees within one to two seasons for most moderate travel schedules.
What to Expect: Everyday Performance
Translating a panel’s wattage rating into real daily behavior is where a lot of first-time buyers get surprised, so here’s what actually happens across a typical day. In the early morning and late afternoon, when the sun sits at a low angle, expect output well below rated capacity — often under 30% of peak — regardless of which panel you choose, since panel angle relative to the sun matters as much as panel quality at those hours. Midday, under clear skies with a reasonably optimized tilt, a well-positioned 100W panel typically delivers 70–85 watts, consistent with the independent test results cited throughout this guide. Cloud cover cuts output significantly but rarely to zero — expect roughly 10–25% of clear-sky output on an overcast day, which is enough to slow battery drain even if it won’t fully replenish a heavily used bank. Temperature also plays a counterintuitive role: solar cells actually lose some efficiency as they get hotter, which is why panels mounted with an air gap for cooling (standard on rigid panels, absent on adhesive-mounted flexible ones) tend to outperform their rated specs slightly in cooler weather and underperform slightly on scorching summer rooftops. Across a full day in decent conditions, budget on 4–5 “peak sun hours” of near-rated output for most of the continental US, which is the number to plug into your amp-hour calculations from the “How to Choose” section above.
Long-Term Cost and Maintenance
The sticker price of a 12 volt DC solar panel is only part of its real cost, and running the numbers over a 10-year ownership window changes the calculus for several panels on this list. A budget panel like the HQST 100W Polycrystalline, priced around $70–$100, looks like the clear winner on day one — but if it needs replacing once within that decade due to a shorter effective lifespan or a warranty that doesn’t hold up, the total cost can approach or exceed a single premium purchase. The Zamp Solar Obsidian 100W Kit, at $450–$550, only makes financial sense over that same window if its 25-year output warranty and documented durability actually prevent a mid-life replacement — which, based on owner forum patterns, it generally does for buyers who don’t experience the customer-service friction some reviewers report. Maintenance costs across all seven panels are low and fairly similar: periodic cleaning costs nothing but time, and connector or wiring repairs, when needed, typically run $20–$50 in parts regardless of which panel brand you chose. The real long-term cost driver isn’t the panel at all — it’s the charge controller and battery bank, both of which degrade faster than a well-maintained panel and typically need replacement on a 5–8 year cycle well before most panels in this guide would need one.
✨ Don’t miss these exclusive deals! 🔍 Take your off-grid power setup to the next level with this carefully curated lineup. Click a highlighted panel above to check current pricing and availability, and start keeping your batteries topped off the whole family can rely on!
Safety, Regulations, and Standards for 12 Volt DC Solar Panels
While a 12 volt DC solar panel is low-voltage compared to a grid-tied home system, a few safety and regulatory basics still apply. Look for panels and charge controllers carrying UL or ETL listing, which confirms the components passed independent safety testing for fire and electrical hazard risk — all seven panels covered in this guide come from manufacturers that publish this certification. If you’re integrating a 12V solar setup into a larger system that includes an inverter producing AC power, National Electrical Code (NEC) Article 690 governs solar photovoltaic installations in the US, and while most DIY 12V-to-battery setups fall outside strict NEC enforcement, following its wiring and overcurrent protection principles (fuses sized to your wire gauge, proper grounding) is good practice regardless. The Department of Energy’s overview of distributed energy resources and microgrids notes that small-scale solar, including rooftop and mobile installations, makes up a meaningful share of total US solar generation and operates under different oversight than utility-scale systems — relevant context if you’re ever asked whether your RV or van solar setup needs permitting (it generally doesn’t for a standalone 12V battery-charging system with no grid connection). Battery safety deserves equal attention: if you’re pairing any of these panels with a lithium (LiFePO4) battery bank, use a charge controller and any inverter rated specifically for that chemistry, since lithium batteries have different voltage tolerances than AGM or flooded lead-acid batteries and mismatched equipment is a genuine fire risk, not a theoretical one.
Frequently Asked Questions
❓ What is the difference between a 12 volt and 24 volt solar panel?
❓ How many watts do I need for a 12 volt DC solar panel setup?
❓ Can I connect a 12 volt DC solar panel directly to a battery without a charge controller?
❓ How long do 12 volt DC solar panels last?
❓ Is monocrystalline or polycrystalline better for a 12 volt solar setup?
Conclusion
Choosing the right 12 volt DC solar panel comes down to matching wattage, cell type, and mounting format to how you actually use power, not to whichever listing has the most reviews. For most RV and van owners starting their first system, the Renogy 100W Monocrystalline offers the best balance of output, compact size, and warranty backing without the premium price tag of the Zamp Solar Obsidian. Budget-focused buyers with roof space to spare should look at the HQST 100W Polycrystalline or WindyNation 100W Polycrystalline, while anyone building a 200-watt array from scratch will get more for their money starting with the ECO-WORTHY 2-Pack kit. Curved roofs and weight-sensitive builds point clearly toward the Renogy 100W Flexible Monocrystalline, and buyers who’ve already replaced one budget panel and are done doing so should strongly consider the long-term warranty and build quality behind the Zamp Solar Obsidian. Whichever panel you land on, remember that a correctly sized charge controller and properly gauged wiring matter just as much as the panel itself — a great panel paired with undersized wiring will still leave you disappointed. If you’ve read this far, you’re already ahead of most buyers who click “add to cart” based on price alone.
✨ Ready to stop guessing and start charging? Check current pricing on today’s pick above and get your off-grid power sorted before your next trip! 🔋☀️
Recommended for You
- 7 Best Solar Power Kit for Shed With Battery in 2026 (Ranked)
- Solar Generator for RV 30 Amp: 7 Best Picks for 2026
- Best Solar Generator for RV: 7 Top Picks for 2026
Disclaimer: This post contains affiliate links. As an Amazon Associate, I earn from qualifying purchases made through these links, at no additional cost to you.
✨ Found this article helpful? Share it with someone who needs it! 💬🤗