As an Amazon Associate I earn from qualifying purchases. Links in this article may be affiliate links. How we choose gear
Why a Camper Battery Solar Charger Changes Everything Off-Grid
There’s a specific kind of silence that only happens at a dispersed campsite at 7 a.m. — no generators, no hookups, just birds and the hum of your fridge. Then the water pump sputters, the furnace fan groans, and you realize your house battery has quietly bled itself dry overnight. A camper battery solar charger exists to make that moment a thing of the past.
The idea is simple: a panel harvests sunlight, a charge controller turns that raw, unruly voltage into a safe charging profile, and your 12V battery stays topped up while you hike, fish, or nap. The execution, however, is where buyers get burned. Pick a panel too small and you’ll still run dry by day three. Pick the wrong controller and your lithium battery never fully charges. Pick a heavy glass suitcase for a tiny teardrop trailer and you’ll leave it at home.
This guide cuts through that. We compared spec sheets, controller types, warranty fine print, and the feedback themes that show up across retailer listings to help you choose a camper battery solar charger that actually fits how you camp — weekend warrior, full-timer, or someone who just wants the trailer battery alive in April after a winter in storage.
What Is a Camper Battery Solar Charger?
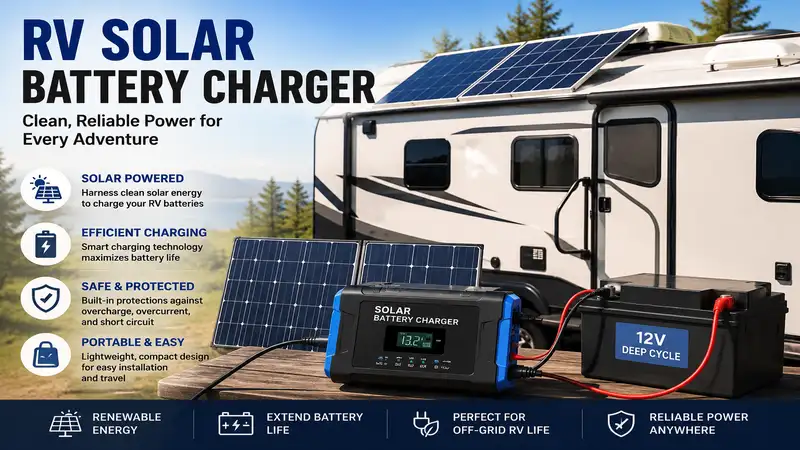
A camper battery solar charger is a solar panel (or panel kit) paired with a charge controller that safely recharges the 12-volt “house” battery in an RV, travel trailer, truck camper, or van. The controller regulates voltage and current so the battery charges fully without overcharging, letting you camp off-grid longer without a generator.
The U.S. Department of Energy describes this same architecture — panels plus batteries, a charge controller, and power conditioning — in its overview of stand-alone renewable energy systems. Your camper is basically a tiny, mobile version of an off-grid home.
Quick note: this article contains affiliate links; see the full disclosure at the end.
Rich Solar MEGA 200: all-weather portable on a budget
Zamp Solar Legacy Series 150W Portable Kit
Premium suitcase
150W
10A 5-stage
~$600–$700
Zamp Legacy 150: Zamp-ready RVs, rugged use
Go Power! Overlander 190W Solar Kit
Roof-mount rigid
190W
30A PWM
~$600–$750
Go Power! Overlander: single-panel roof setup
Go Power! Rigid Eclipse 190W + 30A MPPT Kit
Roof-mount rigid
190W (stackable system)
30A MPPT, RV-C
~$800–$900
Go Power! Rigid Eclipse MPPT: lithium & long-term expansion
SUNER POWER 30W Solar Battery Charger & Maintainer
Small fixed panel
30W
Built-in MPPT
~$100–$170
SUNER POWER 30W: storage-season maintenance
Reading the table top to bottom, the pattern is clear: price climbs with build quality, controller sophistication, and ecosystem integration rather than raw wattage. The Renogy 200W Suitcase and Rich Solar MEGA 200 deliver the most watts per dollar, while the Zamp Legacy 150 and Go Power! Rigid Eclipse MPPT charge a premium for RV-specific connectors, weatherproofing, and expandability. The SUNER POWER 30W is in a different category entirely — it’s a maintainer, not a boondocking power source.
The Renogy 100W Starter Kit is the classic “first solar” purchase for good reason: it gives you a proper rigid panel and a real charge controller for about what a nice camp chair costs.
Inside the box you get a 100W monocrystalline panel, the Wanderer Li 30A PWM controller, a 20-foot MC4 adaptor kit, tray cables, and Z-brackets for roof mounting. The 30A controller is the quiet hero here — it supports up to 400W of panels at 12V, so you can add three more 100W panels later without replacing anything. It also includes sealed, gel, flooded, and lithium charging profiles, which means a future LiFePO4 upgrade won’t strand you. Renogy rates the kit at roughly 500Wh per day under good sun; in practice, a PWM controller feeding a 12V battery typically lands below that nameplate figure.
Who’s it for? Weekend campers with a single group-24 or group-27 battery who mostly need lights, a water pump, phone charging, and the furnace fan. It’s also ideal for DIYers who are comfortable drilling a roof and running cable through a fridge vent or a combiner plate.
Across retailer listings and RV roundups, owners consistently highlight how straightforward the kit is to assemble; the most common caveat is that 100W simply isn’t enough for a 12V compressor fridge on cloudy days.
Pros:
Very low cost of entry for real roof solar
30A controller leaves room to grow to 400W
Lithium charging profile included out of the box
Cons:
PWM wastes some panel output into a 12V battery
Requires drilling and roof sealant work
Typically around $100–$170 at the time of writing — outstanding value if you’re willing to install it yourself.
Renogy 100W 12V Solar Starter KitSee current price, sizes and reviews on Amazon.
The Renogy 200W Suitcase solves the single biggest problem with roof panels: your campsite’s best shade is usually your solar’s worst enemy.
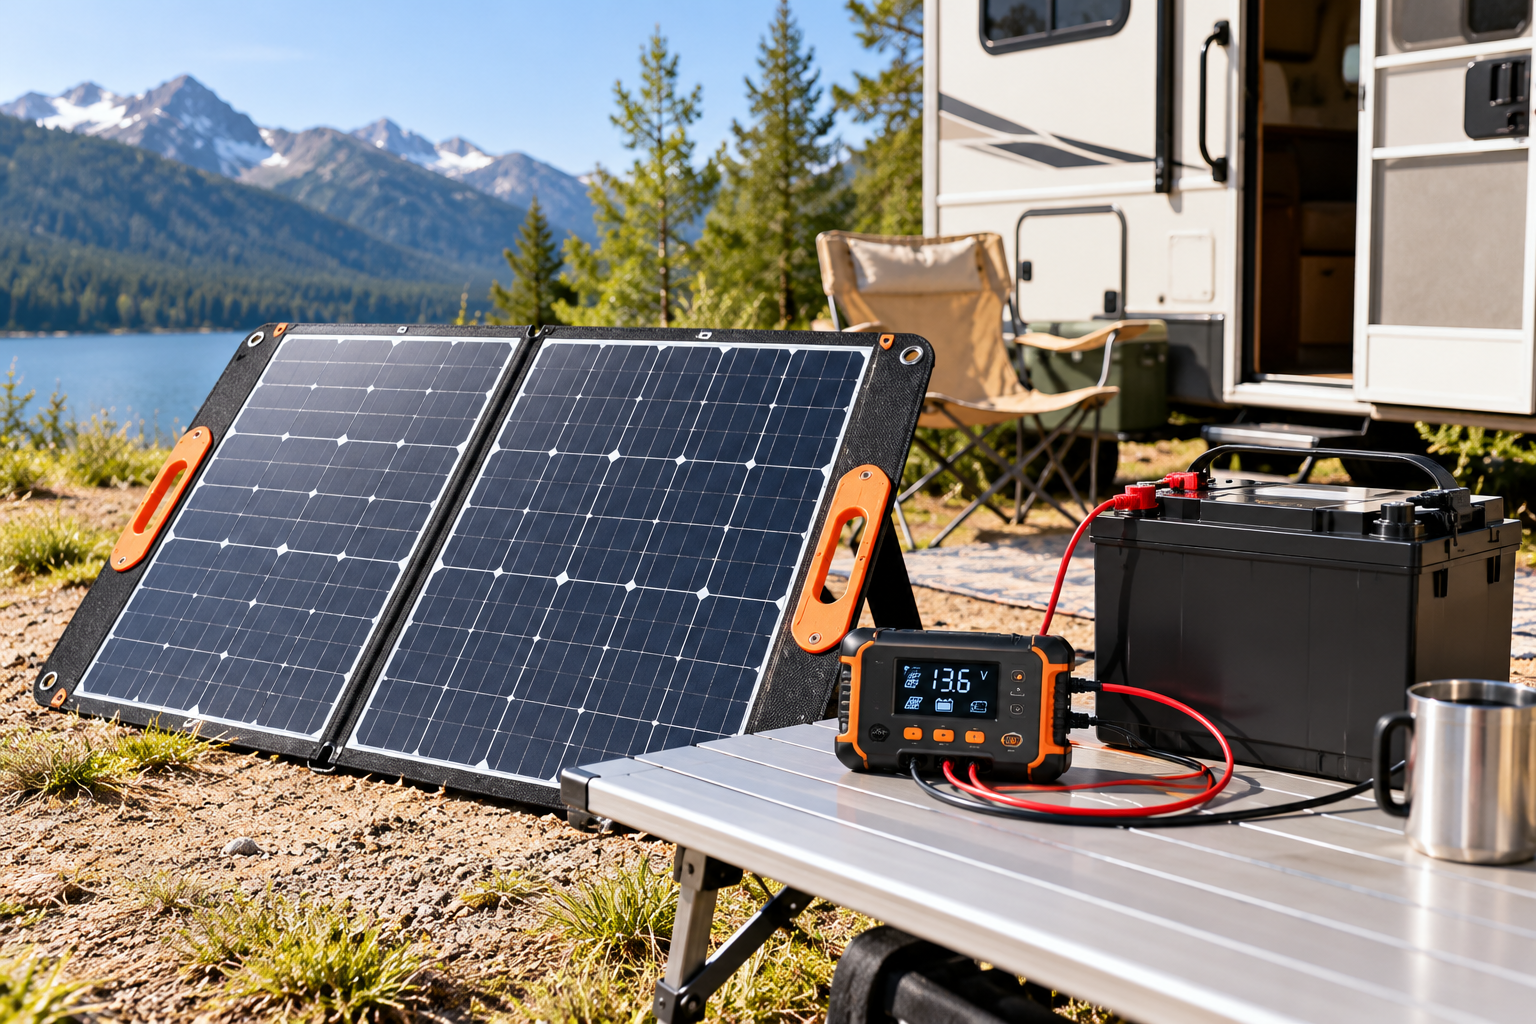
It folds two panels’ worth of N-type cells into a carry case with an aluminum kickstand, and the Voyager 20A PWM controller comes pre-installed on the back. A 4-stage charging profile and negative-ground design make it RV- and trailer-friendly, while the included alligator clips let you connect straight to battery terminals. Practically, that means you can leave the camper under the pines and aim the panel at open sky 20–30 feet away, tilting it toward the sun twice a day for noticeably better harvest than a flat roof panel.
This is the sweet spot for travel-trailer owners who don’t want holes in the roof, renters, and anyone who switches between camper and home backup. Two hundred watts is also enough to meaningfully support a small 12V fridge in good weather.
Renogy’s own listings show the 200W version periodically backordered, which suggests steady demand; retailer feedback generally praises setup speed, while the recurring complaint about suitcases in general is bulk and the temptation to leave them unattended.
Pros:
Genuinely plug-and-play with clips included
Tilt-and-aim harvest beats flat roof panels
No roof penetrations or permanent install
Cons:
Bulky to store in small trailers
Theft risk when left out at busy campgrounds
Roughly $260–$330 depending on promotions — check the current price; strong value per portable watt.
Renogy 200W N-Type Portable Solar Suitcase KitSee current price, sizes and reviews on Amazon.
The Rich Solar MEGA 200 takes the suitcase idea and builds it like a rigid roof panel, with tempered glass and an aluminum frame instead of fabric.
Published specs list a maximum power voltage of 18.6V, open-circuit voltage of 22.8V, and short-circuit current of 11.2A, with a waterproof 20A PWM controller included. That 18.6V figure matters: a PWM controller drags the panel down to battery voltage (roughly 13–14.5V while charging), so you’ll realistically see a meaningful slice of that 200W left on the table. The upside of glass is durability — dealers note it can be left outside in rough weather, unlike fabric-backed foldables. The trade-off is weight: the panel is listed at about 36.8 lbs and folds to roughly 36.6 x 28.5 inches.
Best for truck campers and trailers with a pickup bed or pass-through storage, and for owners who boondock for a week at a time and want a “set it out and forget it” panel. It’s also UL-listed per the spec sheet, a reassuring detail for anything you’ll leave running unattended.
We couldn’t verify a large pool of independent owner reviews at the time of writing, so treat build-quality claims as manufacturer-stated. Note that warranty terms vary by listing — confirm panel and controller coverage before buying.
Pros:
Tempered glass handles rain and wind confidently
Strong 200W output in a portable format
UL listing noted on the spec sheet
Cons:
Heavy at nearly 37 pounds to carry
Short PWM controller warranty on some listings
Around $330–$420 at the time of writing — a solid mid-range buy if weight isn’t a dealbreaker.
Rich Solar MEGA 200 Briefcase Charging KitSee current price, sizes and reviews on Amazon.
The Zamp Legacy 150 is the premium portable choice, designed around the factory solar ports many U.S. RV manufacturers install.
It pairs two 75W Legacy panels with a hinge-mounted, 5-stage, 10A controller that has a large digital display, and it ships with a 15-foot ATP extension cable, fused alligator clamps, and an SAE adapter. Output is rated at about 8 amps. The clever part: the weather-resistant ATP connections let you bypass the onboard controller (using Zamp’s Y adaptor) if your RV already has a controller inside — avoiding the “double regulation” problem that quietly cripples many portable setups. Zamp backs its framed panels with a 25-year output warranty.
This is for owners of newer travel trailers and fifth wheels with a factory Zamp port who want something rugged, quick to deploy, and backed by an established RV brand. At 33 lbs and 32.4 x 21.5 inches closed, it’s manageable but not light.
Dealer listings describe it as a re-engineered version of Zamp’s long-running best-selling suitcase; independent review volume on amazon.com is thinner than for the budget brands, so weigh the warranty more heavily than star counts.
Pros:
Plugs directly into common factory RV solar ports
Controller can be bypassed to avoid double regulation
Rugged nylon case and 25-year output warranty
Cons:
Only 150W at a premium price
10A controller limits future panel additions
Roughly $600–$700 — you’re paying for ecosystem fit and durability, not watts.
Zamp Solar Legacy Series 150W Portable KitSee current price, sizes and reviews on Amazon.
The Go Power! Overlander puts 190 watts into a single rigid module, which means fewer roof penetrations and fewer connections to fail.
The kit includes the 190W monocrystalline module (rated at 9.3 amps), a flush-mountable 30A PWM controller, two 25-foot #10 MC4 output cables, and mounting hardware. The panel measures roughly 59 x 26.3 inches and weighs about 38 lbs, so measure your roof between vents and the AC shroud before ordering. Go Power! also lists a 25-year power output warranty on the module and 5 years on the controller — notably longer controller coverage than most budget kits.
Ideal for owners who want a “dealer-style” install that looks factory, especially on Class C motorhomes and mid-size trailers. The flush-mount controller fits neatly into an interior wall, so you can glance at charge status from inside.
Go Power! kits are widely sold through RV dealers, and this module is also the core of the brand’s larger Weekender inverter package — a sign of how central it is to their lineup. Large-scale verified Amazon review data was limited at writing time.
Pros:
Single large panel minimizes roof holes
Flush-mount controller looks factory-installed
Five-year controller warranty is above average
Cons:
PWM limits efficiency with lithium banks
Large footprint may clash with roof vents
Generally $600–$750 at the time of writing — fair value for a clean, long-warrantied install.
Go Power! Overlander 190W Solar KitSee current price, sizes and reviews on Amazon.
The Go Power! Rigid Eclipse MPPT is what you buy when you’re building a system you’ll keep expanding for years.
Its 30A MPPT controller is the key upgrade: instead of throwing away the gap between panel voltage and battery voltage, MPPT converts that excess voltage into extra charging current. Go Power! claims up to 98% conversion efficiency, the controllers are stackable to 3,000 watts, and the controller is RV-C compatible — meaning it can talk to “smart RV” control panels on newer rigs. The rigid black-framed module is rated at 190W and 9.45 amps, with 25-foot output cables and mounting hardware included. Go Power! recommends pairing it with about 200Ah of AGM or 100Ah of lithium.
Best for full-timers, LiFePO4 owners, and anyone who plans to add panels in series. MPPT pays off most in cold weather, partial shade, and long cable runs — exactly the conditions RVers fight constantly.
The Camping World listing we checked showed a 4.5-out-of-5 customer rating at the time of writing; beyond that, independent review volume is modest, so lean on the warranty (25 years module, 5 years controller).
Pros:
MPPT extracts noticeably more energy daily
Stackable controllers scale to large arrays
RV-C compatibility for smart RV panels
Cons:
Highest price per watt in this lineup
Overkill for occasional weekend campers
Around $800–$900 — expensive up front, but the most future-proof camper battery solar charger here.
Go Power! Rigid Eclipse 190W + 30A MPPT KitSee current price, sizes and reviews on Amazon.
The SUNER POWER 30W isn’t for powering a weekend of camping — it’s for making sure your battery is still alive when camping season starts.
This compact panel uses an ETFE-coated surface and a built-in MPPT controller with selectable 12V, 12V AGM, and 12V Lithium modes and a 3-stage bulk/absorption/float algorithm. It stops charging when the battery is full and resumes when voltage drops, so you can leave it connected for months. It ships with SAE alligator clips, a bare-end cable, and a cigarette-lighter cable. In practice, 30 watts is enough to offset the parasitic draws — propane detectors, stereo memory, LP leak sensors — that silently kill RV batteries over winter.
Perfect for anyone who stores a camper outdoors without shore power, and for owners of pop-ups or teardrops with tiny electrical loads.
Retailer reviews we found are generally positive about plug-and-forget operation; as with any small maintainer, expectations need to be realistic — it won’t recharge a deeply depleted 100Ah battery quickly.
Pros:
Lithium, AGM, and flooded modes selectable
Set-and-forget float charging for storage
Multiple connection cables included
Cons:
Far too small for active boondocking
Pricier than basic trickle chargers
Roughly $100–$170 depending on version — cheap compared with replacing a sulfated battery every spring.
SUNER POWER 30W Solar Battery Charger & MaintainerSee current price, sizes and reviews on Amazon.
The biggest takeaway is that the controller column matters more than the wattage column. A 190W panel on an MPPT controller like the Go Power! Rigid Eclipse MPPT can out-harvest a nominally larger panel on PWM, especially in cold or hazy weather. Meanwhile, expansion headroom quietly separates the Renogy 100W Starter Kit (room to quadruple) from the portable kits, which mostly top out where they start.
How to Choose a Camper Battery Solar Charger
Measure your daily amp-hour use. Add up what your lights, pump, fans, fridge, and devices draw; without this number, every other decision is guesswork.
Know your battery type and usable capacity. Lead-acid batteries are usually only drawn to about 50%, while LiFePO4 can go much deeper — this changes how much solar you need.
Size the panel to roughly replace a day’s use. Multiply wattage by your local peak sun hours, then knock off 20–30% for real-world losses. NREL’s free PVWatts Calculator helps you estimate sunlight by location.
Pick PWM or MPPT deliberately. PWM is fine for small, matched 12V systems; MPPT earns its price with lithium, larger arrays, and cold-weather camping.
Decide roof, portable, or both. Roof panels are always charging while you drive; portable panels chase the sun while you park in shade.
Match connectors to your rig. Check for a factory SAE or Zamp port and confirm whether your RV already has an onboard controller.
Read the warranty split. Panel output warranties often run 25 years, but controller coverage ranges from months to years — the controller is what usually fails first.
Your First 30 Days With a Solar Charger for Camper Battery Systems
Getting a solar charger for camper battery charging out of the box is easy; getting it to perform well takes a few habits.
Day 1: Bench-test before you mount anything
Lay the panel in full sun, connect the controller to the battery first, then connect the panel. Most controllers detect system voltage from the battery side, and connecting the panel first can confuse them. Confirm the display shows charging current climbing toward the panel’s rated amps.
Week 1: Set the right battery profile
The single most common setup error is leaving the controller on its default “sealed” profile with a lithium battery. LiFePO4 needs its own absorption and float voltages; check the battery maker’s spec sheet and match it.
Week 2: Learn your real numbers
Note charging amps at 9 a.m., noon, and 3 p.m. on a clear day. This tells you your true daily harvest versus the brochure. If midday current is far below rated, look for shading, dirty glass, or undersized cable.
Weeks 3–4: Build a maintenance rhythm
Wipe panels with water and a soft cloth every few weeks
Check MC4 and SAE connections for corrosion monthly
Re-torque roof bracket screws after the first long drive
Inspect roof sealant around cable entry points each season
Common first-month mistakes
Leaving the panel lying flat in winter (tilt it toward the low sun), using a thin extension cable that drops voltage, and stacking a regulated portable kit onto an RV port that already has its own controller. That last one deserves its own fix — see the troubleshooting section below.
Real-World Scenarios: Matching the Right Kit to Your Trip
Scenario 1: The weekend family in a 22-foot travel trailer
Budget around $300, one 100Ah AGM battery, two-night trips to state parks without hookups, mostly lights, the water pump, the furnace fan, and phone charging. The Renogy 200W Suitcase fits best here. Family campsites often have trees, and the portable format lets the trailer sit in shade while the panel sits in sun. Two hundred watts comfortably refills a moderately drained AGM bank on a clear day, and there’s no roof work to do.
Scenario 2: The full-time couple with a lithium fifth wheel
Budget up to $1,000 for the first phase, 200–300Ah of LiFePO4, boondocking two weeks at a time across the Southwest, running a 12V compressor fridge and laptops daily. The Go Power! Rigid Eclipse MPPT is the logical foundation. MPPT is essentially mandatory for lithium efficiency at this scale, and the stackable controllers mean they can add panels as their power appetite grows without ripping out the first install. Many full-timers pair a roof array with a portable panel like the Zamp Legacy 150 for shady stops.
Scenario 3: The pop-up owner who stores outdoors all winter
Budget under $150, one small battery, camping six or seven weekends a year, trailer parked in a side yard from November to April. The SUNER POWER 30W is the right tool. It won’t run a campsite, but it will keep the battery floating through months of parasitic drain, and that alone can add years to battery life.
What these scenarios share
In every case, the right camper battery solar charger is determined by battery chemistry and trip length first, budget second, and wattage third.
Power your next trip without the generator noise!
Take your off-grid camping to the next level with this carefully curated lineup. Click a highlighted item to check current pricing and availability. These picks will help you get quiet, reliable power the whole family will enjoy!
Problem → Solution: Fixing Common Solar Charging Headaches
Problem 1: The controller shows charging, but the battery never reaches full. Usually a wrong battery profile or too-low absorption voltage. Match the controller’s settings to the battery maker’s spec, especially for lithium. If you’re on a small PWM controller like the one in the Renogy 200W Suitcase, also confirm the panel isn’t partially shaded mid-day.
Problem 2: My portable kit barely charges through the RV’s factory port. Classic double regulation: your portable kit’s controller feeds the RV’s onboard controller, and the two fight. Use an unregulated panel, or bypass one controller — the Zamp Legacy 150 is designed to allow exactly that with its ATP Y adaptor.
Problem 3: Output collapses when one corner is shaded. Shade on even a few cells can drag down a whole panel. Reposition portable panels as the sun moves, and on the roof, keep panels clear of the AC shroud’s afternoon shadow. MPPT controllers, like the one in the Go Power! Rigid Eclipse MPPT, generally recover better from partial shading.
Problem 4: Voltage looks fine at the panel but low at the battery. Your cable is too thin or too long. Use the gauge recommended in the manual (the Go Power! kits ship with #10 cable for this reason), keep runs short, and check for loose crimps.
Problem 5: The battery is dead every spring. Parasitic loads drained it in storage. Install a battery disconnect, or leave a maintainer such as the SUNER POWER 30W connected all winter.
Portable Solar Panel for Camper vs Roof-Mounted RV Battery Solar Charger
This is the most important structural decision you’ll make, and there’s no universal winner.
The case for a portable solar panel for camper use
A portable solar panel for camper charging chases the sun. You can park under a tree for shade and still aim the panel at open sky, tilt it toward a low winter sun, and pack it away when you leave. There’s no drilling, no sealant, and no roof-load concerns. The Rich Solar MEGA 200 and Renogy 200W Suitcase both make this easy. The downsides are storage space, setup time at every stop, and theft risk — a $300 suitcase lying in a campsite is tempting to the wrong person.
The case for a roof-mounted RV battery solar charger
A roof-mounted RV battery solar charger is always working: while you drive, while you’re away on a hike, while the rig sits in storage. Kits like the Go Power! Overlander and Renogy 100W Starter Kit turn your roof into a quiet power plant you never have to think about. The cost is installation effort, lying flat (which reduces winter harvest), and the risk of shade from your own roof gear.
The hybrid answer
Many experienced RVers end up with both: a modest roof array for passive charging plus a portable panel for shady campsites. If your RV has a factory solar port, the hybrid approach is especially easy.
Power Source
Noise
Fuel / Ongoing Cost
Works While Away
Best For
Solar (roof or Zamp Legacy 150-style portable)
Silent
None after purchase
Yes
Long, quiet boondocking
Gas generator
Loud
Fuel + maintenance
No
High loads like AC
Shore power hookup
Silent
Campground fees
N/A
Developed campgrounds
Driving / alternator (DC-DC)
Engine noise
Fuel while driving
No
Travel days
Solar’s advantage isn’t raw power — a generator easily beats it for air conditioning — but cost-free, silent, unattended charging. That’s why most RVers treat solar as the everyday baseline and keep the generator for heat waves. Note that many campgrounds and public lands also restrict generator hours, which makes solar even more valuable.
PWM vs MPPT: Features That Actually Matter (and Ones That Don’t)
Marketing for any camper battery solar charger loves big numbers. Here’s what really moves the needle.
Matters a lot: the controller type
A PWM controller essentially connects the panel straight to the battery in rapid pulses, so the panel operates near battery voltage. If a panel’s maximum-power voltage is around 18.6V (like the Rich Solar MEGA 200) and your battery is charging at roughly 13.5V, a sizable chunk of potential power simply isn’t captured. An MPPT controller continuously finds the panel’s optimal operating point and converts excess voltage into extra current — the underlying technique is called maximum power point tracking. Manufacturers commonly claim 10–30% more harvest; real-world gains depend on temperature, wiring, and battery state.
Matters a lot: battery profiles
If you own or plan to buy lithium, the controller must support a lithium profile. The Renogy 100W Starter Kit‘s Wanderer Li and the SUNER POWER 30W both do; double-check portable kits before assuming.
Matters: connectors and warranty
MC4 for roof systems, SAE or ATP for portables. And because controllers fail far more often than panels, a 5-year controller warranty like Go Power!’s is worth real money.
Matters less than you think: cell-efficiency headlines
A 22% vs 23% cell efficiency rating mostly affects panel size, not daily energy, at these wattages. Bluetooth monitoring is pleasant but optional — a clear LCD display does the job.
Long-Term Cost and Maintenance
The upfront price of a camper battery solar charger is only part of the story. The real return comes from what it replaces.
What solar saves you
Every night you boondock instead of paying for a hookup site saves campground fees. Every hour the generator stays off saves fuel and maintenance. Less obviously, solar keeps lead-acid batteries out of the chronically half-charged state that sulfates them, which can meaningfully extend battery life — and quality deep-cycle batteries aren’t cheap.
What solar costs you over time
Panels themselves are nearly maintenance-free; output warranties of 25 years are common. Controllers, cables, and connectors are the wear items. Budget for occasional sealant touch-ups on roof installs and possibly a controller replacement over a decade of use.
Kit
Approx. Price Range
Rated Watts
Rough Price per Watt
Value Verdict
Renogy 100W Starter Kit
~$100–$170
100W
~$1.00–$1.70
Excellent starter value
Renogy 200W Suitcase
~$260–$330
200W
~$1.30–$1.65
Best portable value
Rich Solar MEGA 200
~$330–$420
200W
~$1.65–$2.10
Good for durability
Go Power! Rigid Eclipse MPPT
~$800–$900
190W
~$4.20–$4.75
Pays off via expansion
Price per watt makes the budget kits look unbeatable, but it ignores controller quality and expandability. The Go Power! Rigid Eclipse MPPT looks expensive at first glance, yet its controller can anchor a system several times larger — the second, third, and fourth panels cost far less per watt. If you’ll never expand, the Renogy 200W Suitcase delivers the most energy per dollar here.
Camper Solar Battery Maintainer vs Full Charging System: Who Needs What
Not everyone needs the same tool, and a camper solar battery maintainer is not a smaller version of a boondocking kit — it’s a different job.
For storage-only owners
If your camper spends most of the year parked, a camper solar battery maintainer like the SUNER POWER 30W is the priority. Its job is to replace slow parasitic drain and hold the battery at float. It’s cheap insurance.
For weekend campers
One or two nights without hookups calls for 100–200W. The Renogy 100W Starter Kit works if your loads are light; the Renogy 200W Suitcase if you run a small fridge or camp under trees.
For seniors and casual travelers
Simplicity beats watts. A plug-and-play kit like the Zamp Legacy 150, which connects straight to a factory port, avoids wiring and climbing on the roof — a genuine safety benefit.
For full-timers
You need a real charging system: roof panels, MPPT, lithium. Start with something like the Go Power! Rigid Eclipse MPPT and expand.
Common Mistakes to Avoid When Buying a Camper Battery Solar Charger
Buying watts without checking the controller. A cheap 200W kit with a tiny PWM controller can be outperformed by a well-matched smaller system.
Ignoring your factory solar port. Plugging a regulated kit into an RV port that already has an onboard controller wastes output. Confirm what’s behind that port before buying.
Assuming SAE polarity is universal. It isn’t across all brands. Check with a multimeter before connecting a panel from a different manufacturer to your RV’s port.
Undersizing for lithium. Owners upgrading to LiFePO4 often find their old solar can’t refill the bigger usable capacity. Size solar to the battery you’ll have, not the one you have now.
Forgetting winter sun angles. Flat roof panels lose a lot of harvest when the sun sits low. Winter campers benefit from a tiltable portable panel.
Skipping fuses. Every kit should have fusing between controller and battery. Some, like the Zamp Legacy 150‘s fused clamps, include it; others leave it to you.
Safety, Regulations, and Standards
A 12V solar system sounds harmless, but a battery can deliver enough current to melt wire and start a fire if something shorts.
Look for recognized certifications
UL listing on panels and controllers indicates testing to recognized safety standards; the Rich Solar MEGA 200 spec sheet, for example, lists UL, FCC, and cCSAus listings. FCC compliance matters for controllers because switching electronics can create radio interference with your RV’s radio or TV.
Fuse and wire correctly
Install a fuse close to the battery on the positive lead, size wire to the controller’s rated current, and keep connections tight and dry. Lithium batteries should only be charged within the manufacturer’s temperature limits — many LiFePO4 batteries must not be charged below freezing unless they have internal heating.
Understand the system you’re building
State energy offices publish plain-language guidance on off-grid components; South Carolina’s overview of off-grid solar system components lays out the role of the charge controller and battery clearly. For complex installs tied into your RV’s converter, inverter, or transfer switch, have a qualified RV technician review the wiring.
Be a good neighbor on public land
Secure portable panels with a cable lock, keep cables out of walking paths, and don’t leave panels unattended in high winds — a 35-pound suitcase can become a sail.
FAQ: Camper Battery Solar Charger Questions Buyers Ask
How many watts of solar do I need to charge a 100Ah camper battery?
For most 12V campers, 200W is a practical target for a 100Ah lead-acid battery used daily. A 100W panel works for light loads or maintenance. Lithium batteries with deeper usable capacity often benefit from 200–400W, depending on sun and usage.
Can I connect a solar charger directly to my RV battery without a controller?
Only very small maintainers with built-in regulation should go direct. Anything larger needs a charge controller to prevent overcharging, which can damage batteries and create safety risks. Most kits in this guide include one already.
Will a solar charger for camper battery use work on cloudy days?
Yes, but output drops sharply, often to a fraction of rated power. Plan your battery capacity to carry you through a cloudy day or two, and consider MPPT controllers, which tend to harvest more in weak light.
Can I use a portable solar panel with my RV's Zamp port?
Usually, yes. Check whether your RV already has an onboard controller; if it does, use an unregulated panel or bypass the kit's controller to avoid double regulation. Always verify connector polarity before plugging in.
Is MPPT worth the extra cost for a small RV battery solar charger?
For a single 100W panel on a lead-acid battery, PWM is usually fine. MPPT becomes worth it with lithium batteries, 200W-plus arrays, cold climates, or long cable runs, where its efficiency advantage adds up daily.
Conclusion: Pick the Charger That Fits How You Camp
The best camper battery solar charger isn’t the one with the biggest wattage on the box — it’s the one matched to your battery, your trip length, and the way you park.
If you’re starting out on a tight budget and don’t mind a weekend DIY project, the Renogy 100W Starter Kit offers a remarkable amount of capability and room to grow. If shade-loving campsites and zero roof work appeal to you, the Renogy 200W Suitcase is the value pick, with the Rich Solar MEGA 200 as the tougher, heavier alternative. Owners of newer RVs with factory solar ports will appreciate how cleanly the Zamp Legacy 150 slots in. For a permanent, factory-looking roof install, the Go Power! Overlander keeps things simple, while full-timers and lithium owners should build around the Go Power! Rigid Eclipse MPPT. And if your camper mostly sits in a driveway, the SUNER POWER 30W is cheap insurance against dead batteries every spring.
Whichever direction you choose, measure your daily power use first, match the controller to your battery chemistry, and fuse everything properly. Do that, and your camper becomes something genuinely freeing: a home on wheels that quietly refills itself from the sky.
Ready to camp longer and quieter?
Choose the kit that matches your rig and your adventures. Click any highlighted product to check the latest price and availability on Amazon — and enjoy silent, sun-powered nights under the stars!
Disclaimer: This post contains affiliate links. As an Amazon Associate, I earn from qualifying purchases made through these links, at no additional cost to you.
Found this article helpful? Share it with someone who needs it!