
In This Article
Why Van Solar Panels Are the Backbone of Off-Grid Life
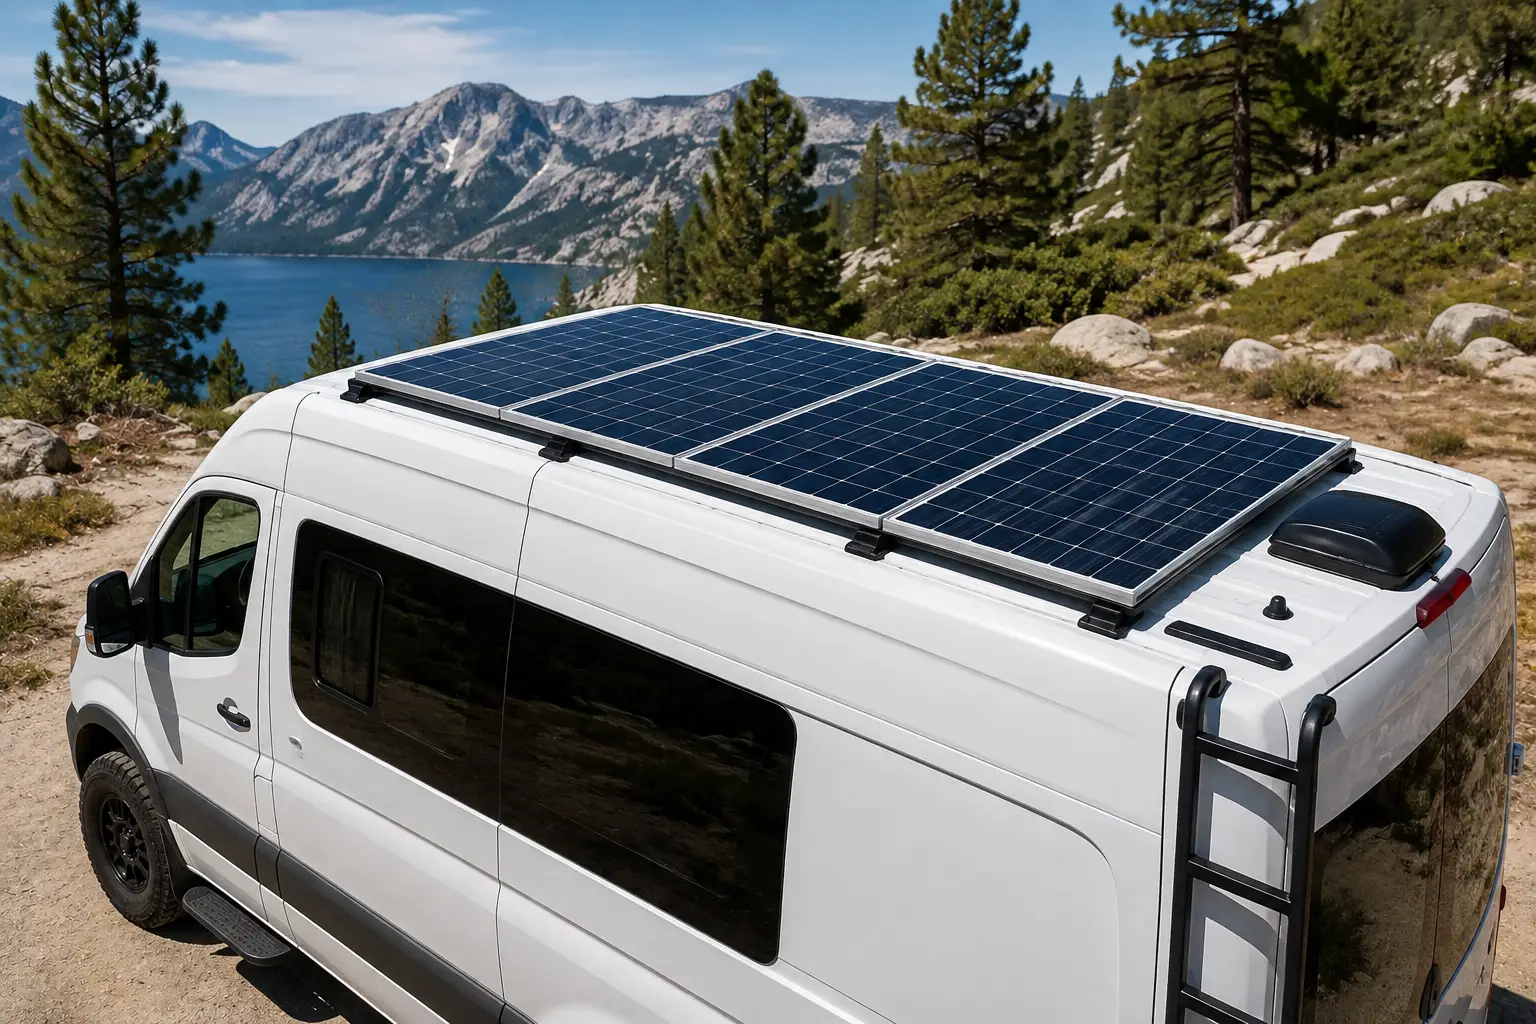
Van solar panels are photovoltaic panels — usually monocrystalline, in rigid, flexible, or portable form — mounted on or carried inside a camper van to convert sunlight into electricity that charges a battery bank. They’re what let you run a fridge, lights, a laptop, and a fan without ever plugging into shore power…
If you’ve spent any time scrolling van life forums, you already know the debate isn’t whether to add solar — it’s which panels actually earn their spot on a roof that’s already crowded with vents, an AC unit, and maybe a bike rack. A poorly matched system either leaves you running a generator at 7 a.m. in a quiet campground (not a great look) or leaves you overpaying for wattage you’ll never use on a weekend trip. Getting this decision right shapes almost everything else about your build, from battery bank size to how long you can boondock before needing to move.
This guide breaks down seven real, current products — rigid, flexible, and portable — covering entry-level budgets through full kit bundles, so you can match the right van solar panels to your actual driving, parking, and power habits rather than to whatever a random forum thread told you to buy. According to the U.S. Department of Energy, photovoltaic cells generate power any time they’re exposed to sunlight, with output scaling directly with panel size, efficiency, and available sunlight — which is exactly the math you need to get right before you drill a single hole in your roof.
Quick Comparison: 7 Best Van Solar Panels at a Glance
| Product | Type | Wattage | Price Range | Best For |
|---|---|---|---|---|
| Renogy 200W Flexible Solar Panel | Flexible mono | 200W | ~$400–$450 | Curved roofs, proven durability |
| BougeRV 200W 9BB Rigid Panel | Rigid mono | 200W | ~$270–$330 | Max efficiency on flat roofs |
| Newpowa 100W Mono 9BB Panel | Rigid mono | 100W | ~$100–$130 | Tightest budgets |
| BLUETTI PV120 Foldable Panel | Portable/foldable | 120W | ~$300–$350 | No-drill, movable power |
| Renogy 400W Complete Solar Kit | Complete system | 400W | ~$900–$1,100 | Beginners who want it all included |
| ECO-WORTHY 200W Solar Kit | Flexible kit | 200W | ~$300–$400 | First-time DIY installers |
| Topsolar 100W Flexible Panel | Flexible mono | 100W | ~$130–$160 | Compact and stealth builds |
Looking at the table, there’s a clear split between panel-only purchases for builders who already own a charge controller and complete kits for people who’d rather buy once and wire it up over a weekend. The Renogy 400W Complete Solar Kit sits at the top of the price range precisely because it bundles batteries and an inverter, while panel-only options like the Newpowa 100W Mono 9BB Panel keep costs down for builders assembling a system piece by piece. Notice, too, that wattage alone doesn’t tell the whole story — a 100W flexible panel and a 200W rigid panel serve very different roof layouts and power needs.
💬 One click helps other shoppers make an informed choice too! 😊
Top 7 Van Solar Panels: Expert Analysis
1. Renogy 200W Flexible Solar Panel — the gold-standard bendable panel
The Renogy 200W Flexible Solar Panel has become the default recommendation in van conversion circles for good reason: it conforms to curved roofs without the mounting brackets a rigid panel demands. At 23% efficiency with an ETFE laminate coating and a roughly 40-degree bend radius, it handles the subtle curve of most cargo van roofs — Transit, Sprinter, ProMaster — without cracking cells or losing meaningful output.
In practice, that ETFE coating matters more than the spec sheet suggests: cheaper flexible panels use PET film that yellows and delaminates within a couple of seasons, while ETFE resists UV degradation for years. The Renogy 200W Flexible Solar Panel backs that up with a 12-year product warranty and a 25-year output warranty, numbers that only make sense if the manufacturer expects the laminate to actually hold up.
This is the panel for builders who want a clean, low-profile roof with no external rack and are willing to pay a premium for a track record. Reviews across van conversion communities consistently describe five-plus years of use without meaningful degradation, though a minority of owners report a 5–10% output drop when the panel is mounted over a heavily crowned roof section — worth checking your roof’s contour before ordering. At around $400 to $450, it’s priced above entry-level flexible panels, but the value-for-money case holds up if you’re planning to live in the van full time rather than take occasional weekend trips.
Pros:
- ✅ Conforms to curved van roofs with no drilling required
- ✅ ETFE coating resists UV yellowing far longer than PET
- ✅ Backed by a 12-year product and 25-year output warranty
Cons:
- ❌ Output can dip 5–10% on tightly curved or crowned roof sections
- ❌ Costs noticeably more per watt than budget flexible panels
2. BougeRV 200W 9BB Rigid Solar Panel — top efficiency for flat roofs
The BougeRV 200W 9BB Rigid Solar Panel trades flexibility for raw efficiency, and at 22.8% it’s among the highest-output rigid options builders can mount on a van. The 9-busbar (9BB) cell design reduces resistance and shading losses compared to older 5BB panels, so a partial shadow from a roof vent costs you less total output than it would on an older design.
Because it’s rigid, this panel needs a tilt-mount rack or flush brackets and a few roof penetrations, which is more labor upfront than a flexible panel but pays off in durability — tempered glass and an aluminum frame simply survive hail, branch strikes, and years of UV exposure better than a laminate surface. Builders converting flat-roofed vans, or those planning to add a tilt bracket for winter sun angles, tend to prefer this over flexible alternatives specifically because rigid panels don’t lose efficiency to curvature the way flexible ones can.
Aggregated reviews describe the BougeRV 200W 9BB Rigid Solar Panel as reliable and easy to wire, with the main complaint being the added weight and the need for roof reinforcement on thinner-gauge van roofs. At roughly $270 to $330, it undercuts Renogy’s flexible flagship while delivering comparable efficiency — a real consideration if your roof is flat enough to skip flexible panels altogether.
Pros:
- ✅ 9BB cell design cuts losses from partial shading
- ✅ Tempered glass holds up better than laminate long-term
- ✅ Lower cost per watt than premium flexible panels
Cons:
- ❌ Requires roof drilling and a mounting rack
- ❌ Adds meaningfully more weight than flexible alternatives
3. Newpowa 100W Mono 9BB Solar Panel — best value for tight budgets
If your build budget is the main constraint, the Newpowa 100W Mono 9BB Solar Panel consistently comes in as one of the cheapest real cost-per-watt options on the market, without dropping to the kind of no-name panel that arrives with a two-week lifespan. At 21.3% efficiency, it’s only marginally behind premium rigid panels twice its price.
What that lower price buys you less of is warranty coverage — Newpowa backs the panel for two years on materials versus the five-year standard some competitors offer — and the company is a smaller operation than Renogy, so replacement parts and support move slower. Still, for a single-panel starter system or a weekend camper van that just needs to keep a 12V fridge and a phone charged, the practical difference is minor.
Reviewers describe the Newpowa 100W Mono 9BB Solar Panel as reliable and straightforward to wire into a basic single-panel setup, and it’s frequently the panel recommended specifically for van lifers testing out solar before committing to a bigger system. At around $100 to $130, it’s the lowest financial barrier to adding real solar to a build, and it scales — Newpowa sells matching 100W panels for anyone who wants to expand later without mismatching cell technology.
Pros:
- ✅ Lowest realistic cost per watt among reputable brands
- ✅ 21.3% efficiency rivals panels costing far more
- ✅ Easy to scale up later with matching 100W panels
Cons:
- ❌ Shorter 2-year materials warranty than premium competitors
- ❌ Smaller company means slower customer support response
4. BLUETTI PV120 Foldable Solar Panel — best no-drill portable option
For builders who don’t want to touch the roof at all, the BLUETTI PV120 Foldable Solar Panel is a 120W portable unit that folds down to roughly 18.5 by 21 inches and sets up outside the van, angled toward the sun, whenever you park. At 23.4% efficiency, it actually outperforms many fixed rigid panels on a watt-for-watt basis.
The tradeoff for portability is obvious: you have to physically deploy and store the panel every time you move, and it only generates power while you’re parked and it’s set up — not while driving, and not if you leave it home. That makes the BLUETTI PV120 Foldable Solar Panel less of a primary power source for full-time van lifers and more of a flexible booster for people who move sites frequently or want backup capacity without permanent roof modifications.
Review sentiment aggregated from portable solar panel comparisons consistently ranks BLUETTI’s build quality above off-brand foldable panels at a friendlier price than the biggest name brands, though the 12-month warranty is noticeably shorter than what fixed panels typically carry. At around $300 to $350, it’s priced for people prioritizing flexibility over permanence — a genuinely different use case than the roof-mounted options on this list, and one worth budgeting for separately if you want both.
Pros:
- ✅ No roof drilling or permanent mounting needed
- ✅ 23.4% efficiency beats many fixed rigid panels
- ✅ Portable enough to reposition for optimal sun angle
Cons:
- ❌ Only generates power while parked and deployed
- ❌ Warranty coverage is shorter than fixed-panel competitors
5. Renogy 400W Complete Solar Kit — best all-in-one bundle for beginners
Builders who’d rather not source a charge controller, inverter, and battery bank separately tend to land on the Renogy 400W Complete Solar Kit, which bundles four 100W panels with a 40A MPPT charge controller, a 2,000W pure sine inverter, and — depending on the exact kit configuration — either AGM or LiFePO4 batteries, plus wiring, fuses, and mounting hardware.
What that bundling means practically is compatibility is handled for you: charge controller amperage matches panel output, inverter capacity matches typical battery bank size, and the wiring gauge is pre-sized for the system. That’s a real advantage for a first-time builder, since mismatched components are one of the most common — and most expensive — mistakes in DIY van electrical systems. The 400W panel array alone generates roughly 1,600 to 2,000 Wh per day under 4–5 peak sun hours, enough to run a compressor fridge, lighting, and device charging comfortably.
Reviews describe the kit’s documentation as genuinely beginner-friendly, and buyers frequently note it works out cheaper than sourcing equivalent components individually. The tradeoff is customization — you’re locked into Renogy’s specific controller and inverter pairing rather than mixing and matching brands. At roughly $900 to $1,100 depending on the battery option selected, it’s the priciest single purchase on this list, but it replaces what would otherwise be four or five separate purchases.
Pros:
- ✅ All major components pre-matched for compatibility
- ✅ 400W array supports a fridge, lighting, and devices comfortably
- ✅ Cheaper than sourcing equivalent parts individually
Cons:
- ❌ Locked into Renogy’s specific controller and inverter
- ❌ Highest upfront cost of any option on this list
6. ECO-WORTHY 200W Solar Kit — easiest first DIY install
The ECO-WORTHY 200W Solar Kit pairs two 100W flexible panels with a 30A MPPT charge controller, MC4 connectors, mounting brackets, and pre-cut cables — a smaller, cheaper cousin to the Renogy bundle above, aimed squarely at first-time installers who want a guided path without a four-figure price tag.
The main practical benefit here is eliminating the compatibility guesswork that trips up new builders: controller amperage is matched to the 200W array from the factory, and the included documentation walks through a standard single-battery setup step by step. Because the panels are flexible, installation typically means adhesive mounting rather than drilling, which lowers the skill floor even further for a weekend project.
Reviewers consistently describe the ECO-WORTHY 200W Solar Kit as convenient specifically because it removes decision fatigue for first-time builders, though the bundled MPPT controller lacks the app-based monitoring and detailed data logging that pricier standalone controllers offer. At roughly $300 to $400, it lands in the middle of this list — more capable than a single panel, far less expensive than a full battery-and-inverter bundle — and it’s expandable to 400W if your power needs grow later.
Pros:
- ✅ Controller pre-matched to panel output, no guesswork
- ✅ Adhesive flexible-panel install skips roof drilling
- ✅ Expandable to 400W as power needs grow
Cons:
- ❌ Bundled controller lacks app monitoring features
- ❌ Two flexible panels wear less gracefully than rigid glass
7. Topsolar 100W Flexible Solar Panel — lightest option for compact builds
For stealth campers, teardrop conversions, or anyone with limited roof real estate, the Topsolar 100W Flexible Solar Panel is an ultra-thin, 2.5mm-profile panel that weighs around 13 pounds — light enough that adhesive mounting alone often holds it without extra bracket hardware.
At 22% efficiency with an ETFE laminate and a 30-degree bend radius, it performs respectably for its size, though the practical output ceiling is real: a single 100W panel generates roughly 300–400 Wh on a good sunny day, enough for lighting, phone charging, and a small fridge, but not enough to run air conditioning or heavy appliances without supplementing from shore power or a generator on cloudy stretches.
That makes the Topsolar 100W Flexible Solar Panel best understood as a starter panel or a secondary unit added onto an existing array rather than a standalone system for full-time off-grid living. Reviewers describe it as easy to self-install even without prior electrical experience, and its low profile makes it genuinely hard to spot from the ground — a real plus for anyone parking overnight in places where an obvious solar array draws unwanted attention. At around $130 to $160, it’s one of the more affordable ways to add real solar capacity to a compact build.
Pros:
- ✅ Ultra-thin, low-profile design stays nearly invisible
- ✅ Light enough for adhesive-only mounting in many cases
- ✅ Genuinely beginner-friendly self-install
Cons:
- ❌ 300–400 Wh/day ceiling won’t cover heavy power draws
- ❌ Insufficient alone during extended cloudy stretches
How to Install and Size Your Van Solar Panel System
Sizing a system starts with adding up your daily power draw in watt-hours: a compressor fridge (500–800 Wh/day), LED lighting (50–100 Wh), a laptop charge (100 Wh), a fan (100–200 Wh), and a phone or two (20–40 Wh) typically lands most single-person builds between 900 and 1,400 Wh per day. Multiply your target daily watt-hours by roughly 1.2 to account for charging inefficiency, then divide by your region’s average peak sun hours (commonly 4–5 hours in most of the continental U.S.) to get your minimum panel wattage.
For installation, flexible panels generally go on with a specialized adhesive designed for the panel’s backing — most manufacturers, including Renogy, sell a matched adhesive rather than recommending generic silicone, which can trap heat and shorten panel life. Rigid panels need either Z-brackets through the roof (sealed thoroughly with butyl tape and a compatible sealant) or a tilt-mount rack for angling toward the sun seasonally.
Whichever panel type you choose, run wiring through a single sealed roof penetration where possible, size your wire gauge to the distance between panel and charge controller (undersized wire is a common source of voltage drop and wasted output), and always install a fuse or breaker between the panel array and the charge controller. Common first-30-days mistakes include skipping a fuse, using too small a wire gauge over long roof-to-controller runs, and mounting panels flat when a slight tilt toward true south would meaningfully boost cold-weather output.
✨ Don’t miss these exclusive deals!
🔍 Take your off-grid power setup to the next level with this carefully curated lineup. Click a highlighted item to check current pricing and availability. These picks will help you get reliable power the whole family will enjoy!
Real-World Van Life Scenarios: Matching Panels to Your Lifestyle
If you’re a weekend camper doing two or three nights a month with a 12V cooler and basic lighting, a single Topsolar 100W Flexible Solar Panel or Newpowa 100W Mono 9BB Solar Panel paired with a small battery is genuinely enough — you’re not running a system hard enough to justify a 400W array, and the money is better spent elsewhere in the build.
If you’re a remote worker living in the van three to five days a week, running a laptop, a compressor fridge, and charging camera or phone gear daily, a 200W setup like the Renogy 200W Flexible Solar Panel or BougeRV 200W 9BB Rigid Solar Panel paired with 100Ah of lithium battery capacity covers typical daily draw with a buffer for a cloudy day or two before you need to plug in or drive somewhere sunnier.
If you’re a full-time van lifer running a fridge, induction cooktop occasionally, a fan or small heater, and multiple devices with minimal driving between stops, the math shifts toward the Renogy 400W Complete Solar Kit or an equivalent 400W array — the extra wattage is what lets you stay parked in one spot for a week or more without generator backup, particularly through shorter winter daylight hours.
How to Choose Van Solar Panels
- Match panel type to your roof. Curved cargo van roofs favor flexible panels; flat-roofed builds or dedicated racks favor rigid panels for their efficiency and longevity.
- Size for your actual daily watt-hour usage, not a generic “van life” number pulled from a forum post — a fridge-only setup needs far less than a build running power tools or AC.
- Check the warranty structure, not just the headline number — a 25-year output warranty backed by a smaller company is only as good as that company’s ability to honor claims years from now.
- Confirm your charge controller amperage covers the array’s short-circuit current with headroom, especially if you plan to expand wattage later.
- Weigh installation labor honestly. Flexible panels save drilling but often wear faster; rigid panels last longer but need real roof work and reinforcement.
- Prioritize efficiency when roof space is limited — a higher-efficiency panel squeezes more watts into the same square footage, which matters most on smaller vans.
- Buy from brands with an established U.S. support and parts history, since solar components occasionally need warranty service years into ownership.
Inflated performance claims are worth watching for while you compare listings — the Federal Trade Commission has flagged deceptive solar sales tactics as an active enforcement priority, a useful reminder to check wattage, efficiency, and warranty claims against independent test data rather than taking a flashy product listing at face value.
Common Mistakes to Avoid When Buying Van Solar Panels
Undersizing the system for winter is one of the most common regrets — peak sun hours can drop by half between summer and December in northern latitudes, so a system that comfortably covers July needs meaningfully more headroom for January. Buyers also frequently mismatch a cheap PWM charge controller with an MPPT-rated panel array, losing 20–30% of potential output in the process; MPPT controllers cost more but capture significantly more usable power from the same panels.
Another frequent error is skipping a fuse or breaker between the panel and controller to save a few dollars — a genuinely risky shortcut given that a wiring fault without overcurrent protection is a real fire hazard rather than a hypothetical one. Finally, plenty of first-time builders buy panel wattage without budgeting proportionally for battery capacity; a 400W array charging a small 100Ah battery bank wastes a meaningful share of your midday generation once the battery hits full charge.
Flexible vs. Rigid Van Solar Panels
Flexible panels win on installation simplicity and roof profile — no brackets, no drilling, and a low-key look that doesn’t scream “camper” from a distance. They typically lose the durability argument over a 5+ year timeline, though, since the laminate backing runs hotter without an air gap underneath it, which accelerates cell degradation compared to rigid glass panels mounted on standoff brackets that allow airflow.
Rigid panels like the BougeRV 200W 9BB Rigid Solar Panel cost more in installation labor and add real weight, but the tempered glass front and aluminum frame consistently outlast flexible laminate in field reports, and the standoff mounting that rigid brackets require actually improves output slightly by keeping the panel cooler than a flush-mounted flexible panel baking directly against a metal roof. For a build you plan to keep for many years, that longevity difference is worth weighing against the upfront convenience flexible panels offer.
Long-Term Cost and Maintenance
Solar panels themselves are close to maintenance-free — an occasional rinse to clear dust, pollen, or bird droppings is typically the extent of the upkeep a panel needs, and manufacturers like Renogy back their glass rigid panels with 25-year output warranties precisely because photovoltaic cells degrade extremely slowly under normal conditions. The real long-term cost driver in a van solar system isn’t the panels; it’s the battery bank, since lithium (LiFePO4) batteries typically last 8–10+ years of daily cycling versus 3–5 years for AGM, which changes the total cost of ownership math considerably over a decade of van life.
Where costs do creep in is connector and wiring degradation from UV and vibration exposure — MC4 connectors and cable jacketing benefit from a yearly visual inspection, and catching a cracked connector early is far cheaper than dealing with a mid-trip charging failure. Budgeting an occasional $20–40 for replacement connectors or dielectric grease over several years of ownership is a realistic maintenance line item, especially for full-time rigs racking up serious mileage and vibration. Output scales directly with the sunlight a panel actually receives, according to the U.S. Energy Information Administration, which is part of why keeping panels clean and unshaded matters as much as the specs on the box.
Safety, Regulations, and Standards
Battery safety matters at least as much as panel selection in a van solar system, since most setups pair panels with a lithium battery bank living just a few feet from where you sleep. The Consumer Product Safety Commission maintains voluntary safety standards for lithium-ion batteries specifically because thermal runaway, while rare in reputable name-brand batteries, is a real risk with poorly made cells — another reason to buy batteries and charge controllers from established brands with UL or ETL listing rather than the cheapest unbranded option available.
Practically, that means checking a charge controller’s UL certification, keeping batteries in a ventilated compartment rather than a fully sealed box, and installing a fuse sized correctly for your wire gauge between every major component in the system — not just as good practice, but as the baseline most reputable van builders and installers treat as non-negotiable.
Van Solar Panels for Different Types of Van Lifers
Weekend and seasonal campers get the most value from a single 100W panel and a modest battery — enough for a couple of nights without ever thinking about power management, and cheap enough that the investment pays for itself against a few nights of campground electrical hookup fees. Remote workers and digital nomads spending most weeknights in the van need enough daily generation to reliably run a laptop and a fridge through a full workday, which typically points toward 200W as a comfortable minimum rather than a maximum.
Full-time off-grid van lifers — especially those boondocking in places without regular access to shore power or a generator — benefit most from oversizing rather than cutting it close, since a 400W array with genuine headroom means fewer compromises during a stretch of overcast weather or shorter winter days, which is exactly why full-timers in cloudier regions of the country tend to size their systems well above the “average” recommendation rather than at it.
Frequently Asked Questions
❓ How many watts of van solar panels do I need?
❓ Can I install van solar panels myself?
❓ Do van solar panels work on cloudy days?
❓ What's the difference between flexible and rigid van solar panels?
❓ How long do van solar panels last?
Conclusion
Choosing the right van solar panels comes down to matching panel type, wattage, and budget to how you actually use your van — not to whatever setup looks best in someone else’s build video. A weekend camper genuinely doesn’t need what a full-time boondocker needs, and paying for unused capacity is just as much a mistake as undersizing a system you’ll rely on daily. Whether you land on the flexible convenience of the Renogy 200W Flexible Solar Panel, the rigid efficiency of the BougeRV 200W 9BB Rigid Solar Panel, the budget-friendly entry point of the Newpowa 100W Mono 9BB Solar Panel, or the all-in-one simplicity of the Renogy 400W Complete Solar Kit, the goal is the same: reliable, self-sufficient power that lets you park where you want instead of where the outlet is.
Take the time to size your system honestly around your actual daily draw, budget properly for the battery bank that pairs with your panel wattage, and don’t skip the fuses and proper wiring gauge just to save a weekend of extra work — those details are what separate a system that quietly works for a decade from one that leaves you stranded on a cloudy week.
Recommended for You
- Replacement Solar Light Parts: 7 Best Picks to Fix Yours in 2026
- Renogy 100W Solar Panel: 7 Best Picks & Buying Guide (2026)
- Battery Pack for Holiday Light: 7 Best Picks for a Brighter 2026 Season
Disclaimer: This post contains affiliate links. As an Amazon Associate, I earn from qualifying purchases made through these links, at no additional cost to you.
✨ Found this article helpful? Share it with someone who needs it! 💬🤗