In This Article
Backpacking Solar Power in 2026: Why It’s Finally Worth the Ounces
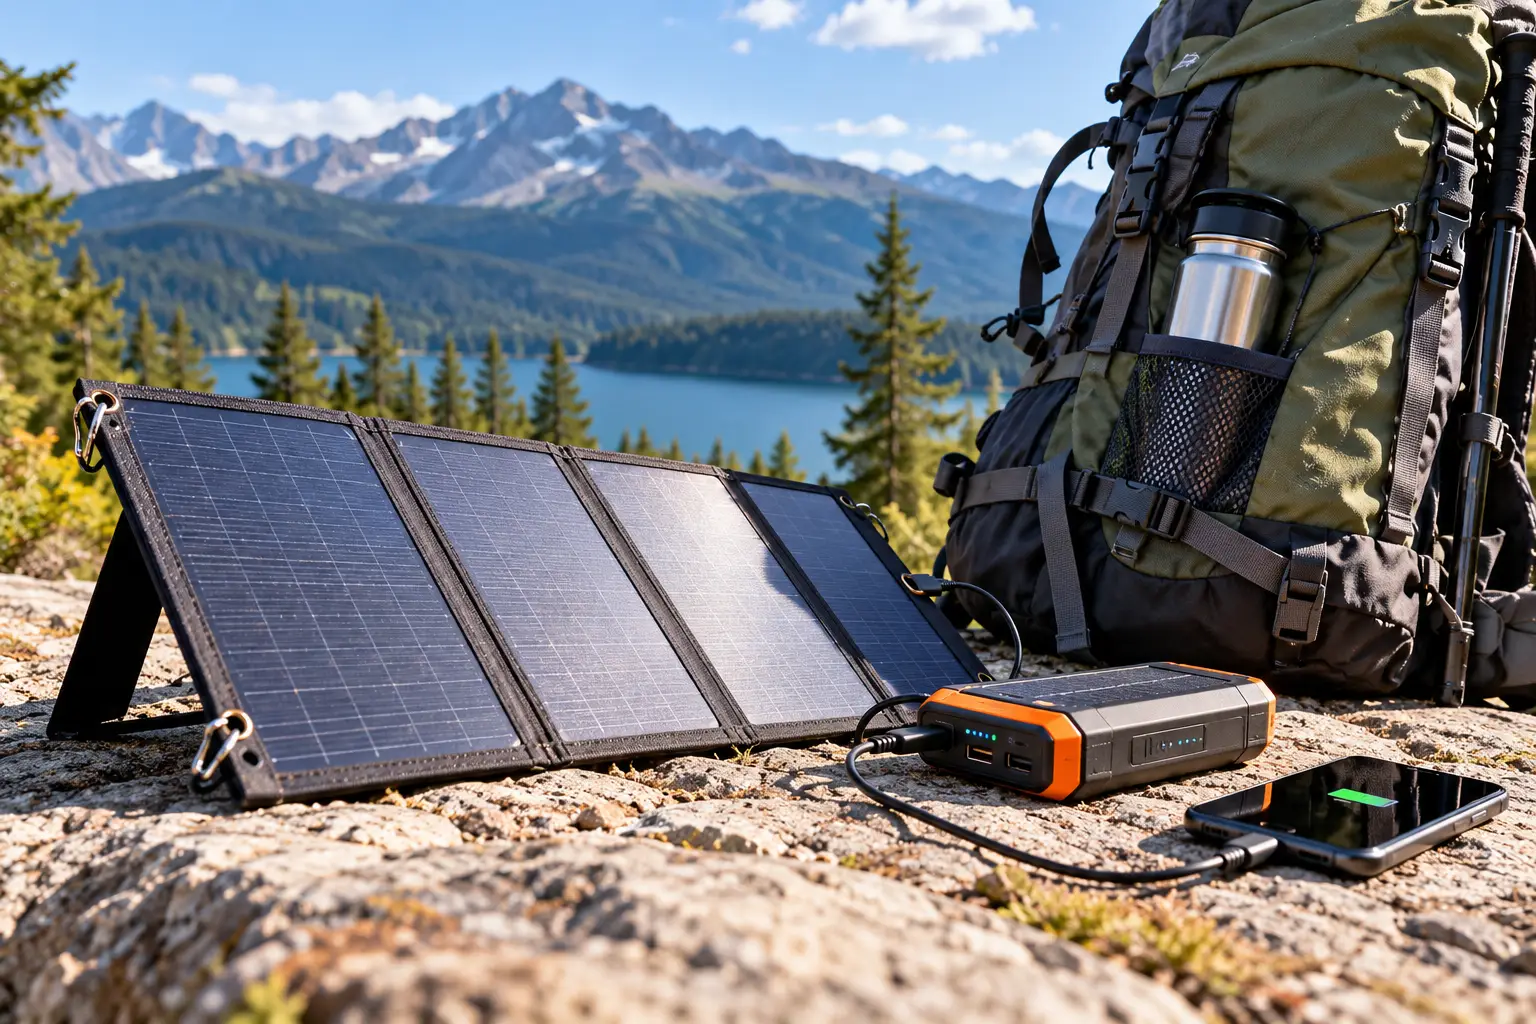
Your phone is now your map, your camera, your emergency beacon backup, and your evening entertainment. Add a GPS watch, a headlamp, and a satellite messenger, and suddenly “off-grid” means “a pack full of things that need charging.” That’s exactly why backpacking solar power has moved from a novelty to a serious gear decision.
Here’s the catch most marketing skips: a solar panel only makes sense when it weighs less than the batteries it lets you leave at home. On a three-day loop with a 10,000 mAh power bank, a panel is dead weight. On a 10-day stretch of the John Muir Trail, a desert section of the PCT, or a two-week bikepacking tour, it can be the difference between a working phone and a very expensive paperweight.
The good news? Panels have gotten dramatically lighter. Today you can carry a 10-watt charger that weighs about the same as a mid-size power bank, or step up to 28–30 watts for well under two pounds. Monocrystalline cells now convert roughly 20–24% of incoming sunlight, and USB-C output is becoming standard.
In this guide, you’ll get an honest breakdown of backpacking solar power options built on real spec sheets, independent lab measurements, and aggregated user feedback — not hype. You’ll see seven real panels available on amazon.com, from a 7-ounce ultralight to a 30-watt workhorse, plus practical setup advice, common fixes, and a buyer’s framework so you pick the right panel the first time. Let’s get your gear charged. ⚡
What Is Backpacking Solar Power?
Backpacking solar power is the use of a lightweight, portable solar panel — usually foldable, 5 to 30 watts — to recharge small electronics like phones, GPS units, headlamps, and power banks while you’re on the trail. It turns sunlight into USB power, extending your battery life between resupply points.
Under the hood, these panels use photovoltaic cells, the same basic technology explained in the U.S. Department of Energy’s primer on how solar photovoltaic cells work. Light knocks electrons loose inside a silicon cell, a controller regulates that current down to a stable 5V USB output, and your device (or power bank) soaks it up.
What makes a backpacking solar charger different from a camping or RV panel is ruthless priorities: weight, packed size, and weather resistance come first, raw output second. A 100-watt panel is fantastic at a campsite, but at 4–5 pounds, it’s not coming up a 3,000-foot climb. For backpackers, the sweet spot sits between 10 and 30 watts, where you get meaningful charging without wrecking your base weight.
Quick Comparison: 7 Best Backpacking Solar Chargers at a Glance
| Product | Rated Output | Approx. Weight | Ports | Price Range | Best for |
|---|---|---|---|---|---|
| BigBlue SolarPowa 28 | 28W | ~23–26 oz | USB-A, USB-C | ~$60–$80 | BigBlue SolarPowa 28: best all-rounder, groups |
| FlexSolar E10 Mini | 10W | ~7–9 oz | USB-A | ~$30–$40 | FlexSolar E10 Mini: ultralight solo hikers |
| BioLite SolarPanel 10+ | 10W + 3,200 mAh battery | ~19 oz | USB-A | $100+ | BioLite SolarPanel 10+: thru-hikers who hate cables |
| Blavor 10W | 10W | ~12.6 oz | USB-A, USB-C | ~$25–$45 | Blavor 10W: budget first-timers |
| Nitecore FSP30 | 30W | ~22 oz | 2× USB-A, USB-C (18W PD) | ~$80–$120 | Nitecore FSP30: fast USB-C charging |
| FlexSolar 20W | 20W | ~14 oz | USB-A, USB-C | ~$35–$55 | FlexSolar 20W: wet climates, bikepacking |
| Goal Zero Nomad 5 | 5W | ~12.5 oz | USB-A | ~$50–$70 | Goal Zero Nomad 5: rough-on-gear hikers |
Prices are approximate ranges at the time of writing and may vary — always check the current price.
Looking at the table, the real split is between the 10-watt ultralights and the 20–30-watt performers. The FlexSolar E10 Mini and Blavor 10W keep weight under a pound but need most of a sunny day to bank a full phone charge, while the BigBlue SolarPowa 28 and Nitecore FSP30 roughly double or triple that pace for an extra 10–15 ounces. The BioLite SolarPanel 10+ stands apart because its onboard battery changes how you charge, not just how fast.
💬 One click helps other shoppers make an informed choice too! 😊
Top 7 Backpacking Solar Power Picks: Expert Analysis
1. BigBlue SolarPowa 28 — fastest charging you’ll still carry
The BigBlue SolarPowa 28 earns its reputation by delivering the most real-world power of any panel that most hikers will willingly strap to a pack.
It’s a four-panel folding design with one USB-A and one USB-C port, a built-in cord pocket, and (on the ammeter version) a live readout of amps flowing out. In independent testing by OutdoorGearLab, it generated about 2,318 mAh in an hour of direct sun — enough to push a typical phone from empty to roughly half in 60 minutes. That ammeter matters more than it sounds: watching the number jump as you tilt the panel teaches you optimal angling in minutes, and a flat-lying panel can throw away a third of its potential output.
Based on comparing the specs, this is the pick for two people sharing one panel on a long trip, or for bikepackers with a flat rack to strap it on. Solo weekenders will find it overkill at roughly 1.5 pounds.
Reviews consistently praise its reliability in mixed conditions and its travel-friendly fold, while the common complaint is the lack of kickstand legs.
Pros:
- ✅ Strong measured output for its weight class
- ✅ Built-in ammeter helps you find the best sun angle
- ✅ USB-C port suits modern phones and messengers
Cons:
- ❌ Too heavy for solo ultralight setups
- ❌ No kickstand, so you’ll need to prop it up
At roughly $60–$80, it’s excellent value for groups and long trips where speed matters more than ounces.
2. FlexSolar E10 Mini — lightest in its class
The FlexSolar E10 Mini is the answer for hikers who count every gram but still want a power source that never “runs out.”
This 10-watt, four-cell folder weighs just over 7 ounces measured by OutdoorGearLab (other reviewers report closer to 9 ounces with accessories), folds to about 4.7 × 6.3 inches — smaller than some phones — and ships with two carabiners. It produced about 1,247 mAh per hour of direct sun in lab testing. In practice, that means a full, sunny day of exposure to bank roughly one phone charge. On paper, that’s modest; on a 10-day trip, it’s an endless trickle that a power bank simply can’t match.
Here’s what to weigh: it has a single USB-A port and no onboard battery, so you’ll pair it with a small power bank and a USB-A-to-C cable. It shines in open alpine, desert, and high-plateau terrain, and struggles under dense forest canopy.
Tester feedback consistently highlights its tiny packed size and rugged backing; the recurring criticism is the exposed USB port.
Pros:
- ✅ Among the lightest 10W panels available
- ✅ Folds smaller than many smartphones
- ✅ Simple, rugged design with few failure points
Cons:
- ❌ Single USB-A port, no USB-C output
- ❌ Exposed port needs care in rain
At around $30–$40, it’s the best weight-to-dollar deal for solo ultralight hikers.
3. BioLite SolarPanel 10+ — banks power while you walk
The BioLite SolarPanel 10+ solves solar’s biggest headache: babysitting a cable and a hot power bank in the sun.
It pairs a 10-watt monocrystalline panel with a built-in 3,200 mAh battery, an adjustable kickstand, and an integrated sundial that shows when you’re perfectly aimed. The practical meaning is huge: the panel fills its own battery unattended, and you charge your phone at camp from clean, regulated power instead of a fluctuating panel. The sundial may look like a gimmick, but correct angling routinely beats a few extra rated watts.
The trade-offs are real. At roughly 19 ounces, it’s heavier than a bare 10W panel, and its IPX4 rating means splash resistance only — it goes inside your pack when real rain starts. Also, 3,200 mAh is less than one full phone charge, so treat it as a buffer, not your main battery.
Across reviewer roundups from Treeline Review and BikeHikeSafari, the onboard battery workflow is repeatedly singled out as the most livable solar setup for thru-hikers; the premium price is the most common complaint.
Pros:
- ✅ Onboard battery removes cable babysitting
- ✅ Sundial and kickstand make aiming effortless
- ✅ Regulated output is gentler on phone batteries
Cons:
- ❌ Heavier than bare 10W panels
- ❌ Only splash resistant (IPX4)
Priced above $100, it’s worth it only if convenience beats raw output for you.
4. Blavor 10W — best value for first-timers
The Blavor 10W is the smartest low-risk way to find out whether backpacking solar power fits your trips.
It’s a 10-watt folder at about 12.6 ounces with both USB-A and USB-C ports, a Velcro pouch sized for a power bank and cable, and carabiner clips. In OutdoorGearLab’s testing, it outperformed its size, collecting around 1,401 mAh per hour of direct sun — the highest among panels rated 10 watts or less — and held its own against some 30-watt models. Translation: you get near-mid-tier charging for a budget price.
Based on comparing the specs, it’s heavier than the FlexSolar E10 Mini by about 5 ounces, but the USB-C port and pouch make it more convenient day to day. It’s ideal for summer backpacking and weekend testers. Budget construction means fabric and stitching are the likely first wear points.
Aggregated review sentiment praises its efficiency and affordability; the most frequent knock is that the USB ports have no protective cover.
Pros:
- ✅ Best measured efficiency among 10W panels
- ✅ Both USB-A and USB-C outputs
- ✅ Handy pouch keeps bank and cable together
Cons:
- ❌ Unprotected ports dislike wet weather
- ❌ Budget build and limited warranty support
At roughly $25–$45, it’s the best value-for-money entry point in this list.
5. Nitecore FSP30 — quickest USB-C power delivery
The Nitecore FSP30 targets hikers whose phones and tablets want fast USB-C charging, not a slow trickle.
It’s a 30-watt, four-panel folder using SunPower cells that Nitecore rates at 24% efficiency, with two USB-A ports plus a USB-C port supporting 18W Power Delivery. At about 1.38 pounds (625 g), it’s light for its output class. A voltage stabilization module adjusts output as sunlight changes, which means fewer “stop-start” charging interruptions when clouds drift by. Steel corner rings let you zip-tie or bungee it to a pack, tent, or rack, and the IPX5 rating handles rain better than splash-only designs.
Here’s what to weigh: 30 watts shines for groups, camera batteries, or a tablet, but it’s more panel than a solo phone user needs. It also lacks a kickstand.
Independent lab data on this model is thinner than for the BigBlue, so rely on specs with healthy skepticism; that said, Nitecore’s own store reports buyers frequently calling it notably lighter than competing 30-watt panels.
Pros:
- ✅ 18W USB-C PD for faster phone charging
- ✅ Three ports charge several devices at once
- ✅ IPX5 rating tolerates real rain
Cons:
- ❌ Fewer independent tests to verify claims
- ❌ Overkill for a single-phone solo hiker
In the $80–$120 range, it’s solid value for USB-C-heavy kits and small groups.
6. FlexSolar 20W — toughest weatherproofing per ounce
The FlexSolar 20W is the panel to grab when your trips involve rain, spray, or a bike rack.
At about 14 ounces for 20 watts, its output-per-ounce sits neatly between the 10W ultralights and the 28–30W panels. It offers USB-A and USB-C outputs and eyelets on every corner, and it’s advertised with an IP67 rating — dust-tight with protection against brief immersion. That rating is the headline: most folders in this class are merely splash resistant, and water in the port box is the most common way cheap panels die.
On paper, this means you can lash it flat across a rear rack, a pack lid, or a tent fly and stop worrying about sudden showers. It’s the natural pick for the Pacific Northwest, the Appalachians in summer, or any bikepacking route with road spray. Claims about charging small laptops should be treated as optimistic outside ideal midday sun.
BikeHikeSafari’s field-based review ranks it best for bikepacking specifically because of its weather resistance and secure corner mounting; the recurring caveat is that it doesn’t include a power bank.
Pros:
- ✅ IP67 rating for wet-weather confidence
- ✅ Corner eyelets secure it on bikes and packs
- ✅ Good 20W output under one pound
Cons:
- ❌ No onboard battery, so pair a bank
- ❌ Laptop-charging claims are optimistic
At roughly $35–$55, it’s excellent value for wet climates and bikepackers.
7. Goal Zero Nomad 5 — nearly indestructible rigid build
The Goal Zero Nomad 5 is for hikers who have already killed a fabric folder and don’t want to do it again.
It’s a single rigid 5-watt panel with kickstand legs, a USB-A port, and a weight around 12.5 ounces. In lab testing it produced about 789 mAh per hour of direct sun — the slowest in this lineup, meaning most of a sunny day to bank one phone charge. The upside is durability: no hinges, no fabric seams, and a build that shrugs off being propped against granite or gravel. Goal Zero’s warranty and support are also a clear step above budget brands.
Here’s the honest verdict: the FlexSolar E10 Mini is lighter, cheaper, and faster. You buy the Nomad 5 for toughness and brand support, not numbers. It suits solo hikers on shorter trips and anyone already using Goal Zero batteries. Because it doesn’t fold, it rides outside your pack, under lid straps or compression straps.
Reviewer consensus praises its ultra-thin rigidity and kickstand, while the most common complaint is its limited 5-watt output.
Pros:
- ✅ Rigid build survives rough handling
- ✅ Kickstand legs for easy sun angling
- ✅ Reliable warranty and brand support
Cons:
- ❌ Slowest charging in this roundup
- ❌ Doesn’t fold, so it rides externally
At roughly $50–$70, it’s fair value for durability, weak value for pure output.
✨ Power up your next trail adventure today!
🔍 Take your backpacking solar power setup to the next level with this carefully curated lineup. Click a highlighted panel to check current pricing and availability. These picks will help you keep your phone, GPS, and headlamp alive on every mile — so you can focus on the views, not the battery icon! 🔋🏔️
Weight vs. Real Output: Which Backpacking Solar Charger Pulls Its Weight?
Rated watts are a lab number measured under perfect, perpendicular sun. Real-world output is what fills your phone. The table below uses independent measurements where available to show how much energy each panel actually delivers per ounce carried.
| Product | Measured Output, 1 hr Direct Sun | Measured Output, 1 hr Cloudy | Weight | Best for |
|---|---|---|---|---|
| BigBlue SolarPowa 28 | ~2,318 mAh | ~551 mAh | ~26 oz | BigBlue SolarPowa 28: speed |
| Blavor 10W | ~1,401 mAh | ~295 mAh | ~12.6 oz | Blavor 10W: value per ounce |
| FlexSolar E10 Mini | ~1,247 mAh | ~235 mAh | ~7.3 oz | FlexSolar E10 Mini: lowest weight |
| Goal Zero Nomad 5 | ~789 mAh | ~227 mAh | ~12.4 oz | Goal Zero Nomad 5: durability |
Measured figures from OutdoorGearLab’s 2026 lab-and-field testing; models not in that test are omitted rather than estimated.
The standout is efficiency per ounce: the FlexSolar E10 Mini delivers about 170 mAh per ounce per sunny hour, beating the BigBlue SolarPowa 28 at roughly 89. But the cloudy column tells a sobering story — every panel drops to about a quarter or less of its sunny output. If you hike mostly in overcast climates, the bigger panel’s larger surface area matters more than its efficiency ratio.
How to Get Started: Your First 30 Days with a Backpacking Solar Charger
A new panel only helps if you know how to use it. Here’s a simple ramp-up plan so your first trip isn’t a frustrating experiment. 🚶♀️
Week 1: Test at Home
Lay the panel in a sunny yard or balcony at midday and charge your power bank for one hour. Note the percentage gained. This single test tells you more about real output than any product listing. Repeat it on a cloudy day so you know your worst case.
Week 2: Learn the Angle
Aim the panel perpendicular to the sun. A practical trick: adjust until the shadow of the panel’s edge disappears. If your panel has an ammeter (like the BigBlue SolarPowa 28) or sundial (like the BioLite SolarPanel 10+), use it to confirm. Re-aim every 45–60 minutes as the sun moves.
Week 3: Build the Charging Chain
Always go panel → power bank → phone, not panel → phone. Direct charging makes many phones stop and restart as clouds pass, which is slow and hard on the battery. Keep the power bank in shade — tucking it under the panel works well — because lithium batteries overheat and shut down in direct sun.
Week 4: Take It on an Overnight
Set it out at lunch and again at camp in the afternoon. Treat any charging on your moving pack as a bonus, not the plan.
Maintenance Basics
Wipe the cells with a damp, soft cloth; never fold the panel with grit inside; close port covers in rain; and dry the junction box before plugging in. Store it flat or loosely folded in a cool, dry place off-season.
Real-World Scenarios: Matching the Panel to the Hiker
Specs only make sense in context. Here are three common profiles and the reasoning behind each match.
🏜️ The Solo Thru-Hiker on the PCT Desert Section
Budget: under $50. Use: phone in airplane mode, GPS watch, headlamp; 6–8 days between resupplies; strong sun most days.
Best match: the FlexSolar E10 Mini plus a 10,000 mAh power bank. In open desert sun, 7 ounces of panel tops off the bank at every long break. Since weight compounds over 2,650 miles, this is where the ultralight choice clearly wins. If you’d rather skip the cable juggling and can spend more, the BioLite SolarPanel 10+ is the convenience upgrade.
🌧️ The Couple on a Rainy Olympic Peninsula Loop
Budget: around $50. Use: two phones, one satellite messenger, a camera; 7 days; frequent drizzle.
Best match: the FlexSolar 20W. Its IP67 rating matters more here than raw watts, and 20W spreads well across two people’s devices. Split the weight: one partner carries the panel, the other carries a 20,000 mAh bank.
🚴 The Bikepacker on a Two-Week Tour
Budget: $80–$120. Use: phone, bike computer, lights, camera batteries; daily riding in mixed conditions.
Best match: the Nitecore FSP30 or the BigBlue SolarPowa 28. On a bike, 1.4 pounds is barely noticeable, and a flat rear rack gives the panel constant, unshaded sun. The FSP30’s 18W USB-C PD helps charge phones faster at lunch stops; the BigBlue’s ammeter helps you optimize positioning.
Problem → Solution: Fixing the 5 Most Common Solar Charging Headaches
Even the best backpacking solar charger has quirks. Here’s how to solve the issues hikers hit most often.
1. “My phone keeps connecting and disconnecting.” ✅ Solution: Stop charging the phone directly. Charge a power bank from the panel, then charge the phone from the bank. Panels with voltage regulation, like the Nitecore FSP30, reduce this issue but don’t eliminate it.
2. “I clipped it to my pack all day and got almost nothing.” ✅ Solution: A moving panel sits at poor angles and gets shaded by your body and trees. Charge stationary at breaks and camp instead. The BioLite SolarPanel 10+ is the best compromise if you insist on on-the-move charging, since its onboard battery captures whatever trickle arrives.
3. “My power bank shut off in the sun.” ✅ Solution: It overheated. Place the bank in shade under the panel or inside a light-colored stuff sack. Heat also lowers panel efficiency, so a panel on dark rock at noon underperforms.
4. “Rain ruined my charging port.” ✅ Solution: Close port covers and unplug cables at the first drops. For wet climates, choose a higher IP rating like the FlexSolar 20W.
5. “Output collapsed when a branch shaded one panel.” ✅ Solution: Partial shade on a single cell can slash a panel’s entire output. Reposition so every cell sees full sun, and prefer smaller, more compact panels like the FlexSolar E10 Mini under patchy canopy.
How to Choose Backpacking Solar Power: 7 Steps
Use these steps in order — they’re sequenced so each answer narrows the next.
- Count your days between resupplies. Under about five days, a power bank alone usually wins. Beyond eight, solar starts to justify its weight.
- Total your daily energy needs. Add up phone, watch, messenger, and headlamp in mAh. Most phones hold roughly 4,000–5,000 mAh.
- Match wattage to need. A 10W panel suits one phone plus a watch; 20–30W suits two people or a camera-heavy kit.
- Set a weight ceiling. Ultralight hikers should aim near 8–13 ounces; group or bike setups can go to 1.5 pounds.
- Check ports. If your devices use USB-C, prioritize a panel with USB-C output to avoid adapters and extra losses.
- Pick a weather rating for your climate. IPX4 is splash-only; IP67 handles sustained rain and brief immersion.
- Decide on battery style. Choose a bare panel plus separate power bank for flexibility, or an integrated battery like the BioLite SolarPanel 10+ for simplicity.
For deeper lab data behind these criteria, OutdoorGearLab’s side-by-side solar charger testing measures direct and cloudy output for nearly 20 models — a useful cross-check before you buy.
Backpacking Solar Charger vs. Power Bank Alone: Which Wins?
This is the question most guides dodge, so let’s answer it straight. A good 10,000 mAh power bank weighs around 7 ounces and holds two to three phone charges; a 20,000 mAh bank weighs about 12–14 ounces and holds four to six. For a four-day trip, that’s lighter, cheaper, and simpler than any panel.
| Factor | Power Bank Only | Backpacking Solar Power + Bank | Best for |
|---|---|---|---|
| Weight on short trips | Lighter | Heavier | Power bank: weekend trips |
| Energy on 7+ day trips | Runs out | Keeps refilling | Solar: thru-hikes |
| Works at night / in rain | Yes | Bank yes, panel no | Power bank: storm-prone routes |
| Long-term cost | Low | Moderate | Solar: frequent long trips |
The pattern is clear: solar doesn’t replace a power bank — it refills one. Once your trip length means you’d otherwise carry a second or third battery, a light panel like the FlexSolar E10 Mini or Blavor 10W becomes the lighter option overall. For shorter trips, save the ounces and the money.
Features That Actually Matter (and Ones That Don’t)
Marketing sheets love big numbers. Here’s what genuinely changes your trail experience.
✅ Features That Matter
- Measured output, not rated watts. A well-built 10W panel can beat a mediocre 30W panel in indirect light, as lab testing of the Blavor 10W shows.
- USB-C output. It avoids adapters and, with PD support like on the Nitecore FSP30, speeds up phone charging.
- Angling aids. Kickstands, sundials, and ammeters routinely add more real energy than a few extra watts.
- IP rating on the port box. The cells are laminated and tough; the junction box is where water kills panels.
- Mounting points. Corner eyelets or rings let you fix the panel securely to a pack lid, tent, or bike rack.
❌ Features That Don’t (Much)
- “Up to” efficiency claims above 24%. Real differences between good monocrystalline panels are small compared to angle and shade.
- Built-in compasses and flashlights. Nice extras, but they add weight and don’t improve charging.
- Tiny solar panels glued onto power banks. Lab tests show these barely trickle-charge themselves.
- Laptop-charging claims on sub-30W panels. Technically possible in perfect sun; unrealistic on a real trail.
What to Expect: Everyday Performance of a Portable Solar Panel for Backpacking
Setting expectations saves frustration. With a portable solar panel for backpacking, a clear summer day in open terrain can deliver four to six hours of useful charging. A 10W panel like the FlexSolar E10 Mini will fill a typical phone in about three to five hours of good sun (via a power bank), while a 28W panel like the BigBlue SolarPowa 28 can do it in roughly one to two hours under ideal conditions.
Cloudy days change everything. Output can drop by 75% or more, so plan in days rather than hours. Morning and late-afternoon sun is weaker because light passes through more atmosphere, meaning the midday window (roughly 10 a.m. to 2 p.m.) does most of the work.
Temperature matters too. Solar cells lose efficiency as they heat up, so a panel on cool, bright alpine terrain can outperform the same panel baking on desert sandstone. Elevation helps as well: thinner air at altitude lets more sunlight reach the cells.
The real-world rhythm most successful solar hikers settle into looks like this: long lunch break with the panel propped and aimed, a quick re-aim at mid-afternoon, and a final session at camp before the sun drops behind the ridgeline. That routine, not the panel’s wattage, is what keeps devices alive.
Solar Power Bank for Hiking: Are All-in-One Units Worth It?
A solar power bank for hiking sounds perfect: one device, no cables, sun-powered. The reality is more complicated, and it’s worth understanding before you spend money.
Most “solar power banks” are standard battery packs with a small solar panel glued to one face. That panel is typically a few square inches — far too small to meaningfully recharge a 10,000–20,000 mAh battery. In OutdoorGearLab’s testing, several of these units generated almost nothing in an hour of sun, and even a better four-panel all-in-one model needed an estimated 29 hours of strong midday sun to refill itself.
That doesn’t mean integrated designs are useless. The key difference is panel size relative to battery capacity. The BioLite SolarPanel 10+ flips the ratio: it’s a real 10W panel with a small 3,200 mAh buffer battery, so it actually fills up in a sunny afternoon. That’s a functional hybrid.
Here’s what to weigh: if you like the one-device idea, choose a panel with a small onboard battery, not a large battery with a tiny panel. Otherwise, the most efficient pairing remains a dedicated folding panel like the Blavor 10W plus a separate, quality power bank. You get better output, more flexibility, and the ability to leave the panel home on short trips.
Long-Term Cost and Maintenance
Backpacking solar power has an unusual cost profile: you pay once, and the “fuel” is free. Here’s how value plays out over a few seasons.
| Product | Upfront Range | Expected Strength | Long-Term Value | Best for |
|---|---|---|---|---|
| FlexSolar E10 Mini | ~$30–$40 | Weight savings | High for solo hikers | FlexSolar E10 Mini: frequent solo trips |
| Blavor 10W | ~$25–$45 | Efficiency | High, if kept dry | Blavor 10W: occasional users |
| BigBlue SolarPowa 28 | ~$60–$80 | Output | High for groups | BigBlue SolarPowa 28: shared power |
| Goal Zero Nomad 5 | ~$50–$70 | Durability, warranty | Moderate | Goal Zero Nomad 5: rough use |
Budget panels offer the best cost per watt, but budget brands generally offer weaker warranty support, so careful handling protects your investment. Premium options like the Goal Zero Nomad 5 and BioLite SolarPanel 10+ cost more upfront, partly for build quality and customer service.
Maintenance is minimal but important. Solar cells degrade slowly — typically a small fraction of a percent per year — so the parts that fail first are hinges, stitching, cables, and USB ports. Replace cheap cables every season or two, since worn cables waste output. Keep panels out of hot cars during storage, and avoid sharp creases.
The real hidden cost is the power bank you’ll pair with it. Budget for a quality 10,000–20,000 mAh bank — it’s what actually stores your solar energy.
Safety, Regulations, and Standards
Solar panels themselves are low-risk, but the lithium batteries you pair them with come with rules and safety considerations worth knowing.
✈️ Flying to the Trailhead
If you fly to your trail, power banks count as spare lithium-ion batteries. Under FAA rules, they must go in your carry-on bag, not checked luggage, and batteries over 100 watt-hours need airline approval. Check the FAA’s PackSafe guidance on lithium batteries before your trip. A 20,000 mAh bank is typically around 74 Wh, well under the limit. The solar panel itself can go in either bag.
💧 Understanding IP Ratings
IP ratings follow an international standard defined by the IEC, summarized well in this overview of the IP code. The first digit covers dust, the second water. IPX4 means splash resistance (like the BioLite SolarPanel 10+), IPX5 handles water jets (like the Nitecore FSP30), and IP67 adds dust-tightness plus brief immersion (like the FlexSolar 20W). Remember that ratings often refer to the panel surface; port boxes can still be vulnerable.
🔥 Heat and Battery Safety
Never leave a charging power bank in direct sun or inside a closed tent on a hot afternoon. Lithium cells can overheat, degrade, or shut down. Look for panels with overcurrent and short-circuit protection, and choose power banks from reputable brands with FCC-compliant electronics.
Common Mistakes to Avoid When Buying Backpacking Solar Power Gear
Most disappointment with backpacking solar power comes from avoidable buying errors. Here are the big ones.
1. Buying on Rated Watts Alone
Rated wattage is a best-case lab figure. Independent tests show real folding panels often deliver a third to a half of their rating on the trail. Compare measured output when available.
2. Going Too Big
A 40–60W panel sounds reassuring, but at two to three pounds it rarely makes the pack. The lightest panel you’ll actually carry beats the powerful one left at home.
3. Skipping the Power Bank
Solar without storage means you can only charge while the sun shines. Budget for a panel and a bank from the start.
4. Ignoring Your Climate
A panel that’s perfect for Utah’s canyons can disappoint in the Smokies. If you hike under canopy or in frequent overcast, prioritize surface area and weather resistance, or reconsider solar entirely.
5. Forgetting About Ports and Cables
A USB-A-only panel like the Goal Zero Nomad 5 or FlexSolar E10 Mini needs the right cable for USB-C devices. Pack a short, quality cable; long, thin ones waste power.
6. Falling for Solar Power Banks
Small panels glued onto big batteries look convenient but barely charge. Choose a real panel instead.
FAQ: Backpacking Solar Power
❓ What is the best backpacking solar charger for thru-hiking?
❓ How many watts do I need for backpacking solar power?
❓ Can I buy a waterproof backpacking solar panel?
❓ Is a 10W solar panel enough to charge an iPhone on the trail?
❓ Are cheap backpacking solar chargers worth buying?
Conclusion: Choosing Your Backpacking Solar Power Setup
Backpacking solar power works best when you treat it as a system, not a gadget: a right-sized panel, a quality power bank, and a charging routine built around breaks and camp time. Get those three pieces right, and your phone, GPS, and messenger stay alive on even the longest stretches between towns.
If you’re a solo ultralight hiker, the FlexSolar E10 Mini delivers the most energy per ounce. First-timers on a budget will get outstanding value from the Blavor 10W. Thru-hikers who hate juggling cables should look hard at the BioLite SolarPanel 10+, while wet-climate hikers and bikepackers will appreciate the FlexSolar 20W‘s weatherproofing. For groups and power-hungry kits, the BigBlue SolarPowa 28 and Nitecore FSP30 offer the fastest charging you’ll realistically carry. And if you’re simply hard on gear, the Goal Zero Nomad 5 trades speed for toughness.
Before you buy, run your own numbers: days between resupplies, daily energy needs, and typical weather. For trips under five days, a bigger power bank might be all you need. For longer adventures, a good panel pays for itself in freedom. And wherever you set up your panel, follow Leave No Trace principles — the sun is free, and so should the trail stay pristine. 🌄
🌞 Ready to charge off the grid?
⚡ Don’t let a dead battery cut your adventure short! Click any highlighted panel above to check current pricing and availability, and build a backpacking solar power setup that keeps you connected, safe, and exploring longer. Your next sunrise summit deserves a charged camera! 📸
Recommended for You
- 48v solar battery Guide 2026: 7 Best Picks & 5 Costly Mistakes
- 2kw solar system: 7 Best Kits for Reliable Power in 2026
- 200w portable solar panels: 7 Powerful Picks Worth Buying in 2026
Disclaimer: This post contains affiliate links. As an Amazon Associate, I earn from qualifying purchases made through these links, at no additional cost to you.
✨ Found this article helpful? Share it with someone who needs it! 💬🤗